How to Manage Joomla Menus
Your Guide to managing Menus in Joomla.
Managing Menu Items
Joomla comes installed with the main menu created for you. This is the primary menu for your site, though you do have the ability to create as many new menus as you need, and not all of them have to appear anywhere on your site. Some menus can be hidden, and do little more than allow for your content to be displayed differently when linked outside of a menu module.
Menus do not just link to different pages and URLs to your site. They are a determining factor in how contents and page styles are set. Each menu item has an alias that is used to create URLs which are understandable by humans and search engine friendly (SEF).
You can also nest menu items within menus to create submenus. In order to display a menu on a page, a menu module needs to be created.
In this documentation, we will explore what menus are and how to configure your own.
How to Create a Menu
Creating a new menu is a fairly straightforward process. Whether you want this new menu to appear on the frontend of your site or not, you can create it easily using the Administrator end of your Joomla site.
-
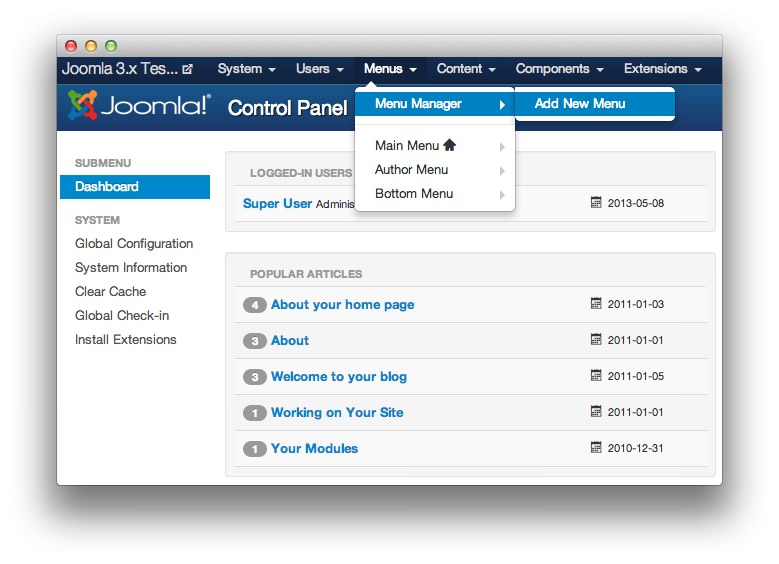 1Add New MenuThis will initiate the creation of a new menu.
To start, you will need to navigate to Administrator > Menus > Menu Manager > Add New Menu (point 1) to initiate the creation of a new menu.
-
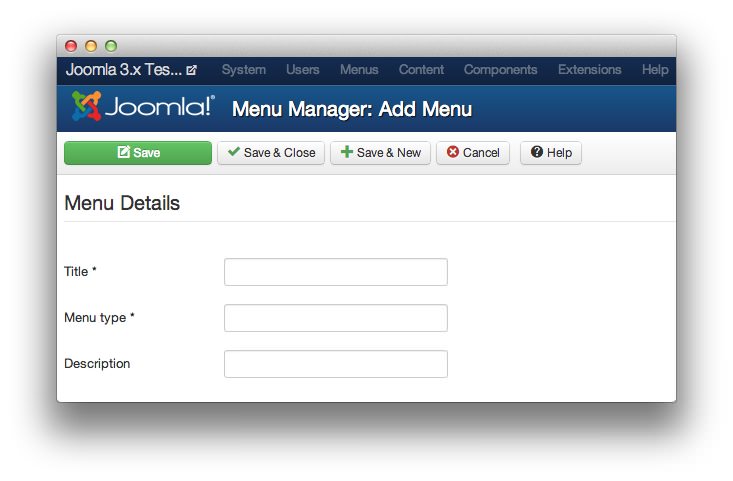 1SaveThis options bar allows you to save your new menu.2TitleThis title will appear in the Administrator Menubar and lists.3Menu TypeThis sets the system name for the menu.4DescriptionThis is where you describe what your menu does.
Next, you will need to fill out the Menu Details page to give your menu a title (point 2), type designation (point 3), and description (point 4).
The Title (point 2) you set for the menu will appear in the Administrator Menubar and lists.
The Menu Type field (point 3) sets the system name for the menu.
The Description field (point 4) is where you describe what your menu does. It can be a useful personal reminder or indicator during collaborative site builds.
Once you are done filling out at least the Title and Menu Type, click either Save (point 1) or Save and Close to create your new menu. You can also choose (Save + New) if you wish to create more than one menu.
-
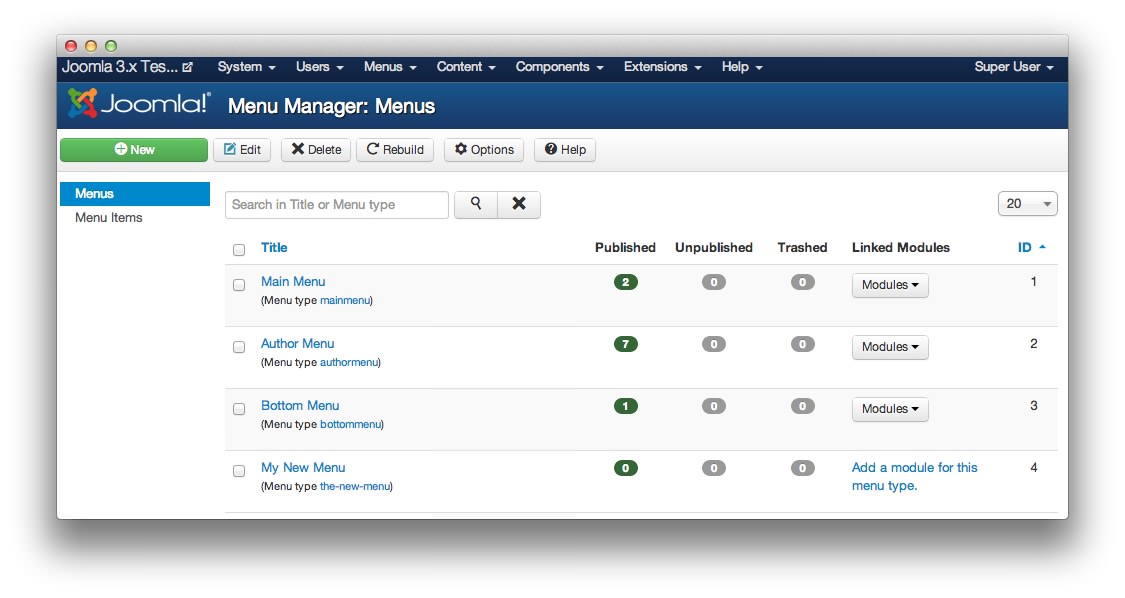 1Once you have saved your new menu, it should appear in the Menu Manager.
Once you have saved your new menu, it should appear in the Menu Manager (point 1). This is also the page you will use to edit and manage your new menu.
Managing Your Menus
Proper menu management is important to make sure your site is well organized and efficient. It is easily to work yourself into a corner by creating redundant menus or find some of your modules out of order when the wrong option is changed.
-
1NewThis will initiate the creation of a new menu.2EditChecking a menu and selecting Edit will take you a page in which you can change the title, menu type, and description.
The main page within the Menu Manager is the Menus tab. This is where you can see a list of your existing menus, edit them, and create a new menu.
The big green New button (point 1) enables you to create a new menu (see the section above for more details).
By selecting the checkbox next to your desired menu and clicking Edit (point 2), you can modify the title, menu type, and description of the menu.
You can also click the name of your desired menu to view and edit the menu items which appear in that particular menu.
Adding and Managing Menu Items
-
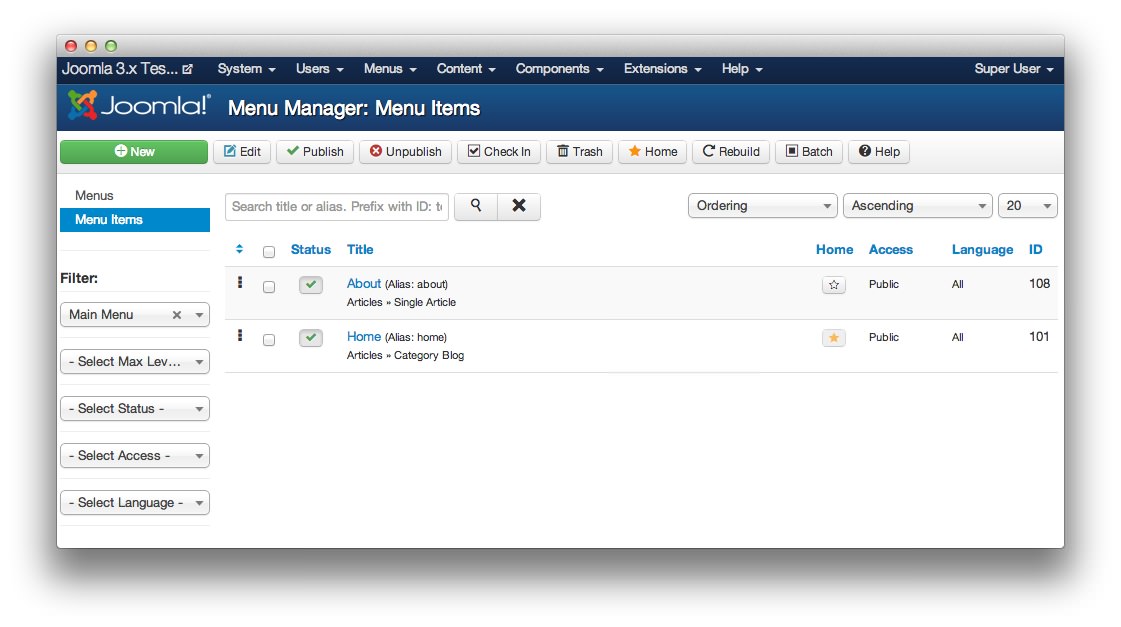 1FilterThis will allow you to easily locate a particular menu item.
The Menu Items area of the menu manager gives you the ability to view specific items within a particular menu. For menus with an extensive amount of individual items, you can filter what you see in this page using several different options (point 1).
You can publish or unpublish particular menu items by either selecting the menu items and choosing Publish or Unpublish from the toolbar just below the Joomla logo, or by clicking the checkmark in the Status column corresponding to the menu item you wish to modify.
You can also designate a particular menu item as the home page of your site. This page will be what appears when you visit the root of your site.
You can click any individual menu item's title to delve deeper into that particular item's options. You can also select the New button to create a new menu item.
-
 1Menu Item TypeWhat type of link is it? You can link a component, URL, alias, separator, or heading.2Menu TitleThis is the title of the menu item that will display in the menu.3AliasAlias is used for search engine friendly (SEF) linking. Use this to modify the link for the menu item.4StatusThis sets the publication status for the menu item. It can be published, unpublished, or trashed.5LinkThis is the link for this menu.6Menu LocationThis indicates which menu the link will appear in.7Parent ItemThis is useful when you wish to change the level of a link in order to put it below another link in the menu, or make it a top-level link.8OrderingThis indicates which menu item the select item will appear after in the designated menu.9AccessWhich level group do you want to have access to view this menu item?10Default PageIs this menu item the home page of your site?11Template StyleThis allows you to use a different template for this particular menu item. Useful if you have different styles set on your site for one page to the next.12LanguageThis is where you assign a language to a menu item.
The Details area of the menu item editor gives you access to the most commonly used options relating to a menu item. You can change virtually anything about the link from its behavior to the type of link it is.
The Menu Item Type field (point 1) allows you to assign a menu item type. These types include (but are not limited to: URL, alias, separator, heading, etc.
The Menu Title field (point 2) sets the title given to the menu item within the menu.
The Alias field (point 3) is used for search engine friendly (SEF) linking. Use this to modify the link for the menu item.
The Status options (point 4) allow you to set whether this menu item is published, unpublished, or trashed.
The Link field (point 5) gives you a link to the menu itself.
The Menu Location options (point 6) set which menu this link is appearing within. It is usually the menu you selected to get to the menu items area of the menu manager.
Parent Item (point 7) is useful when you wish to set a particular menu item in a submenu to another item. For example, a more specific topic within a larger topic.
The Ordering field (point 8) gives you the ability to set a menu item which the item you are editing will appear after in the menu. If you want the menu item to appear after the Home link, this would be set to Home.
Access (point 9) allows you to determine which user group will be able to see this link in the menu.
The Default Page toggle (point 10) sets the menu item as your site's home page.
If you want to set this particular menu item to a different template style, you can do so via the Template Style option (point 11).
Language gives you the ability to switch between languages for individual menu items. This is useful if you have one area designated for Spanish while the rest of your site is in English.
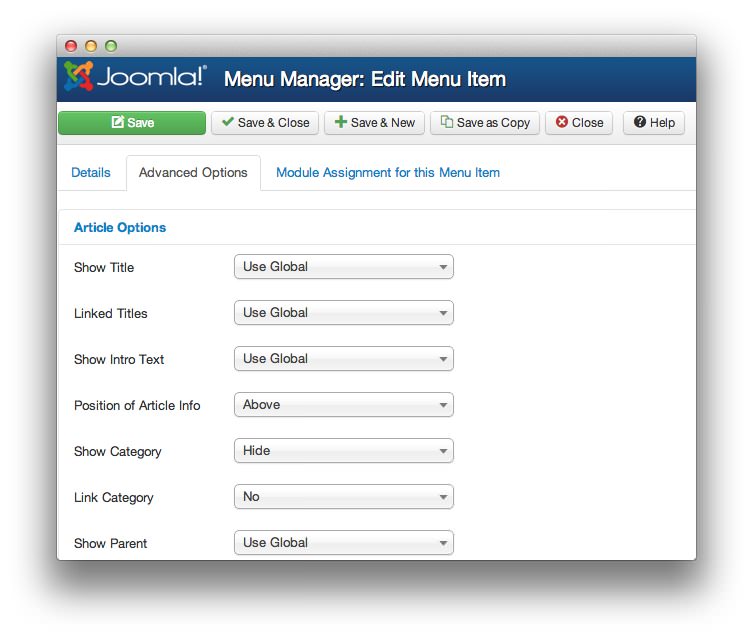
The Advanced Options tab gives you access to more advanced configuration options relating to the menu item and how it appears on your site. You can do things like show and hide the title, intro text, and category.
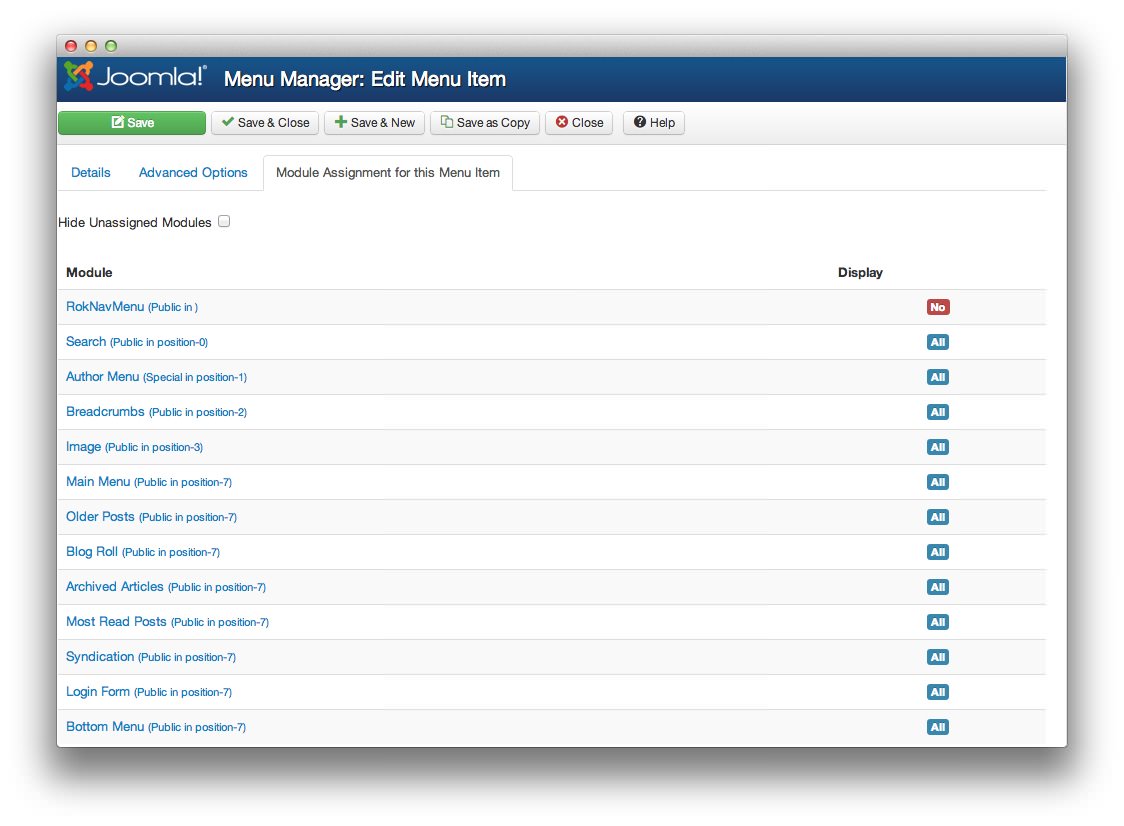
The Module Assignments for Menu Item assist you in configuring which modules will appear within your particular menu item. For example, if you have a home page that you do not wish to have a particular module appear in, you can modify this assignment here.
Creating Menu Modules
Creating a menu module allows you to add any menu to your site in just about any position you would like to have it. This is a great way to add some extra functionality beyond the primary menu that usually comes pre-configured at the top of your template. Sometimes, you just want to have a menu leading directly to specific articles, forms, or pages that you may not want to appear on every page the main menu does, or for every visitor.
-
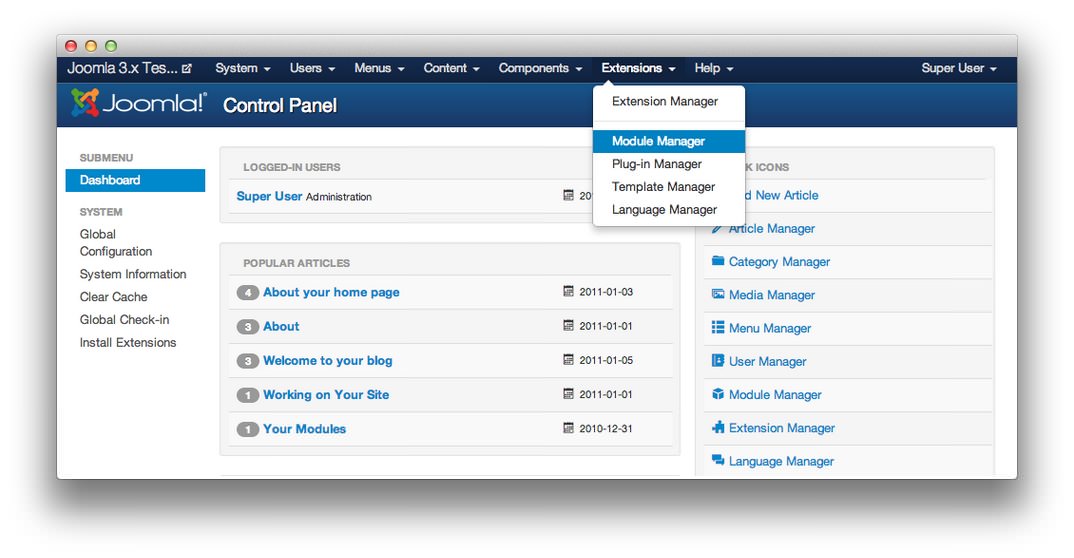 1Module ManagerThis is where you will need to go to create and manage modules for your Joomla site.
The first step to creating a menu module (beyond creating the menu) is to navigate to the Module Manager from Administrator > Extensions > Module Manager (point 1).
-
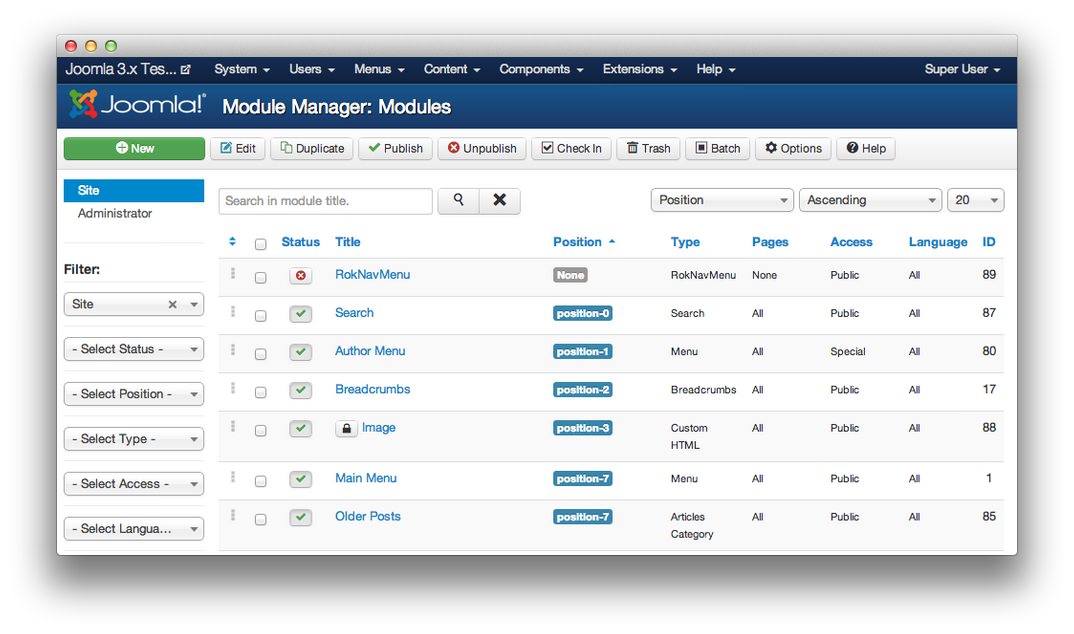 1NewThis button will initiate the creation of a module.
Next, you will need to create a new module for your menu. Think of the module as a box with which you can place any number of different things. In this case, you are building a box for a menu. Just hit the big green New button (point 1) to get started.
-
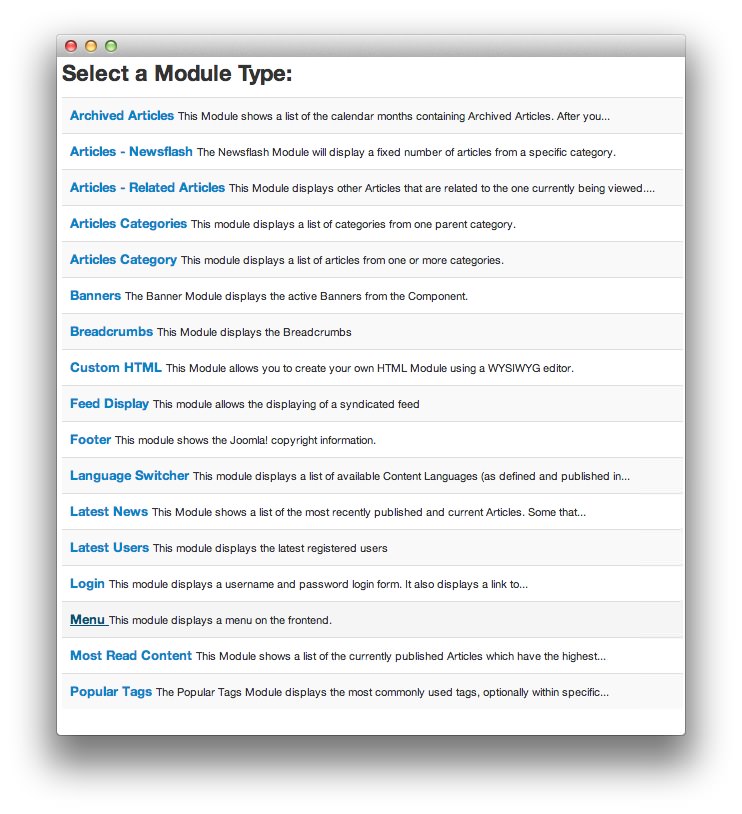 1Menu
1Menu
Creating a new menu module requires that you select either Menu (point 1) or an alternative menu extension (like RokNavMenu).
So far in this process, we have created a box and told Joomla what type of material will appear in the box. In the next page, we will tell Joomla which menu we'd like the box to display.
-
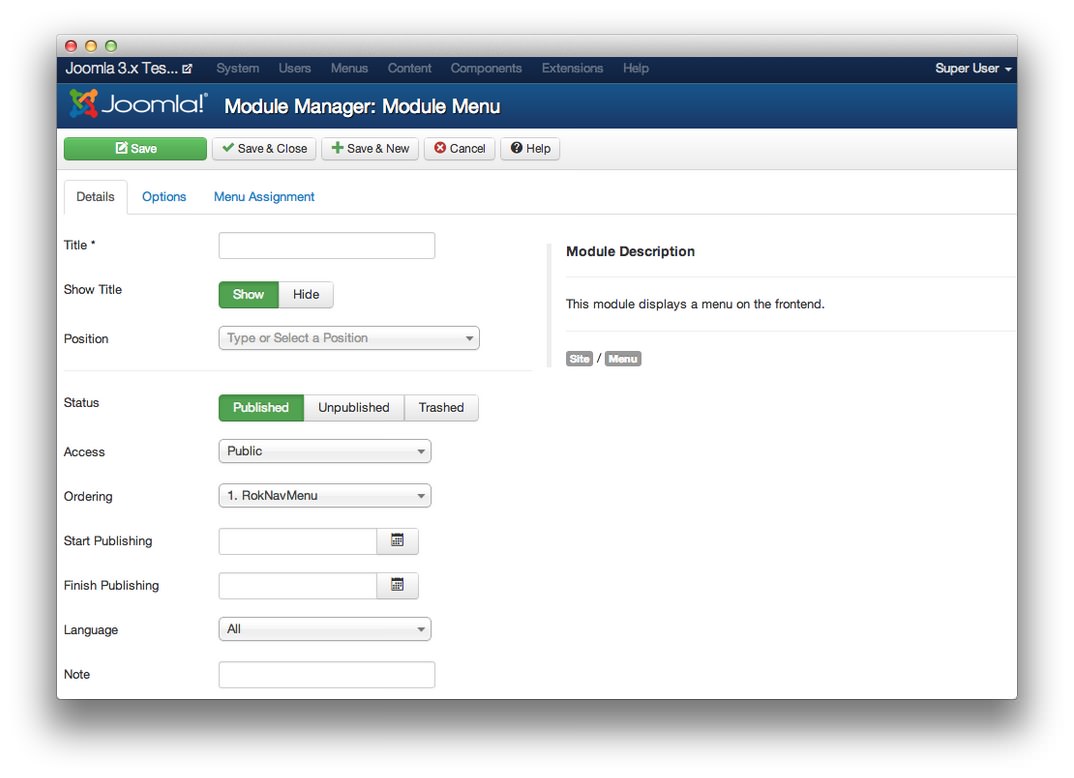 1Title / Show TitleNew modules must have a title. You can elect to make it visible to visitors or hidden using the option below.2PositionThis is the title of the menu item that will display in the menu.3StatusThis sets the publishing status for the module. If unpublished or trashed, it will not appear on the frontend of your site.4AccessThis option enables you to determine which user group levels have access to view the module on the frontend.5Start/Stop PublishingThis option allows you to specify a time when the module will start and stop being published.
The Title and Show Title options (point 1) allow you to give your module a name, and decide whether or not this name should be displayed on the frontend of your site.
The Position field (point 2) sets where on the assigned pages your menu module will appear.
The Status option (point 3) sets the publishing status for the module. If unpublished or trashed, it will not appear on the frontend of your site.
You can configure which user group levels are able to view the module using the Access option (point 4).
You can configure the menu Ordering, and publishing start/stop times (point 5) on this page as well. By setting these times, you can elect to have a module appear on the site for a limited time. This is especially useful when the module gives visitors access to a contest page or links to a temporary promotional area of the site.
You can also assign a specific language to the module.
-
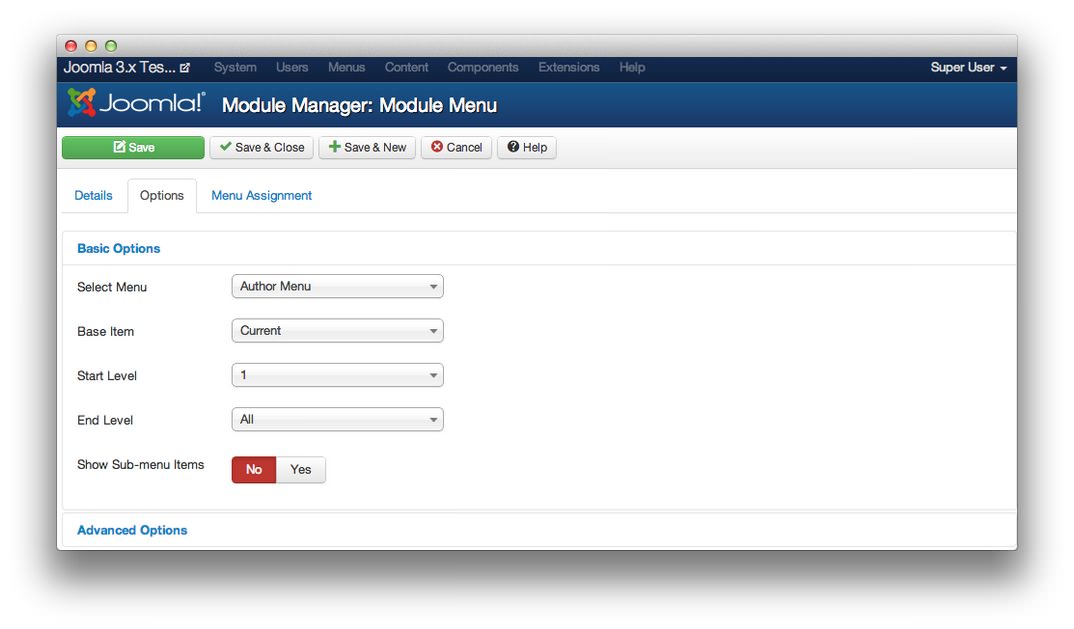 1Select MenuThis option gives you access to basic and advanced options you can use to further customize how your menu module appears to visitors.2Base ItemThis is the base item for the displayed menu.3Start LevelThis indicates which menu level the page needs to be to start rendering the module. It will continue to render for lower levels until it reaches the End Level set in the field below.4End LevelThis indicates which menu level you would like the module to stop rendering after.5Show Sub-menu ItemsThis indicates if you want the full menu, including sub-menus, to appear in the module.
The Options tab gives you access to basic and advanced options you can use to further customize how your menu module appears to visitors. This tab may be propagated with different options depending on if you go with the default menu module or an extension. For the purposes of this tutorial, the images you see here are generated with the default menu options.
The Select Menu option gives you the ability to assign a specific menu to the module.
Base Item is the base item for the displayed menu.
The Start Level field (point 3) indicates which menu level you would like the module to begin rendering at. Likewise, the End Level (point 4) field determines which level the menu will stop rendering at. If these fields are the same and Show Sub-menu Items (point 5) is checked yes, the module will only render menu items within that particular menu level.
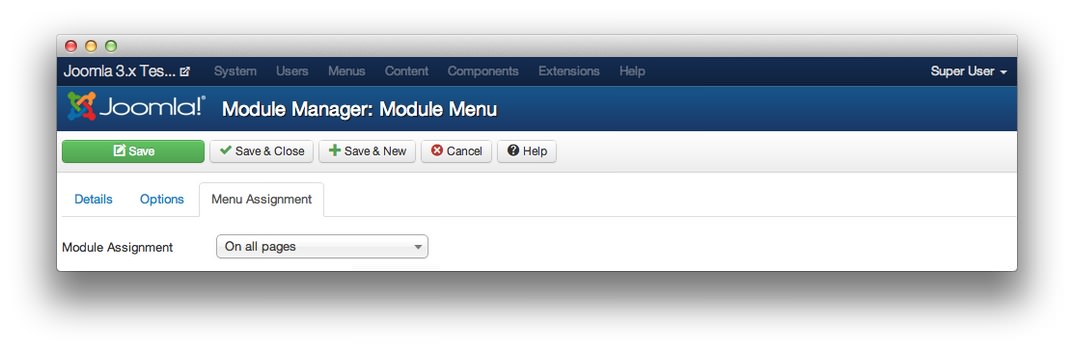
The Menu Assignment tab gives you the ability to elect particular pages or areas on your site where the module will appear.