RokBox
RokBox is a state-of-the-art responsive modal solution for WordPress with support for images, videos, widgets and much more.
How to use
The essence of RokBox2 is an <a> link with some data-sets that let RokBox identify the link in the page. Just like any <a> link, a RokBox2 link can be placed just about anywhere in a page.
The most basic and simple example of a RokBox2 snippet to get it up and running is:
<a data-rokbox href="http://(Your Site URL).com/images/my_image.jpg">This is a RokBox 2 Link</a>
This is a regular <a> link. The only extraneous bit is that data-set data-rokbox. Being just a normal link, it implies that you can have any type of content you want. In this case we used This is a RokBox 2 Link as simple text, but it could have been an image and worked exactly the same.
NOTE: RokBox2 snippets can be easily generated using the user-friendly Editor Button Plugin.
Data-sets
Data-sets are introduced with HTML5, and allow you to attach data to HTML elements. They are extremely useful for JavaScript. In the past, developers were relying on the class attribute and different class names where added for referencing settings.
Moving away from class names in favor of data-sets allows you to not only to keep the HTML cleaner, but to also avoid possible conflicts with class names.
RokBox2 has different data-sets, each with a specific meaning and all optional with the exception of data-rokbox, which is what triggers RokBox2 to identify a link. If the data-rokbox is not specified, the link will be skipped and will just function as a regular plain link.
Below is a summary of implemented data-sets for RokBox2.
| data-set | Description |
|---|---|
data-rokbox |
Triggers RokBox2 to identify an element as a RokBox2 link versus a regular link. |
data-rokbox-caption |
Defines the caption of the link. It allows HTML syntax, but needs to be converted to HTML entities (more info) |
data-rokbox-album |
Associates the link to an album. Many links with the same album will trigger navigation (more info) |
data-rokbox-element |
Specifies the element in the DOM, through CSS-style selectors (more info) |
data-rokbox-generate-thumbnail |
Triggers RokBox2 to auto-generate a thumbnail, if the link is to a local image (more info) |
data-rokbox-size |
Sets a fixed size for the RokBox2 popup. |
data-rokbox-caption
The caption is an optional data-set and will be shown on the popup when the specified link gets triggered.
If desired, a caption can also be written using HTML syntax, but it has to be converted into HTML entities in order to work.
It is suggested not to abuse the HTML syntax in a caption to prevent potential layout issues. The preferred HTML syntax one would use are inline tags, such as <strong>, <a>, <em>, etc.
Here are a couple of examples of a RokBox2 link with caption, both plain caption and HTML caption.
<!-- Plain Caption -->
<!-- Output: The description of my picture -->
<a data-rokbox data-rokbox-caption="The description of my picture" href="http://(Your  Site URL).com/images/my_image.jpg">RokBox 2 Plain Caption</a>
<!-- HTML encoded Caption -->
<!-- Output: The description of <strong>my picture</strong> -->
<a data-rokbox data-rokbox-caption="The description of <strong>my picture</strong>" href="http://(Your Site URL).com/images/my_image.jpg">RokBox 2 HTML Caption</a>
If you do not know how to convert to HTML entities, you can find many online tools to do it for you. We've listed three such tools below.
You could also use the Editor Button which does convert automatically your caption into HTML entities.
data-rokbox-album
Assigning the same album value to different RokBox2 links will trigger the navigation on the popup. You can see the album as a way of grouping certain media into the same context. You can navigate forward or backward either by clicking on the arrows or through the left and right arrows keys (⇠ / ⇢).
Imagine having 3 pictures of a product that you want the user to navigate through. This is how you would achieve it:
<a data-rokbox data-rokbox-album="My Product" data-rokbox-caption="Product Front View" href="http://(Your Site URL).com/images/product1.jpg">Product 1</a>
<a data-rokbox data-rokbox-album="My Product" data-rokbox-caption="Product Side View" href="http://(Your Site URL).com/images/product2.jpg">Product 2</a>
<a data-rokbox data-rokbox-album="My Product" data-rokbox-caption="Product Back View" href="http://(Your Site URL).com/images/product3.jpg">Product 3</a>
As can be noticed, all three links share the same album name. The album name is just an identifier string and won't be visible anywhere. For this very reason it is advised to keep the album name as simple as possible. Try avoiding using unicode characters or any special characters as they might cause issues during interpretation from RokBox2.
data-rokbox-element
RokBox2 allows you to open in a popup elements that have been already rendered on the document (DOM). The elements must be referenced through the CSS-Style syntax.
For instance, if you wanted to open in RokBox2 an element with the id #my-element structured in such way:
<div id="my-element">
    <ul>
        <li>Item 1</li>
        <li>Item 2</li>
        <li>Item 3</li>
    </ul>
</div>
The equivalent RokBox2 syntax for loading that element will be:
<a data-rokbox data-rokbox-element="#my-element" href="#">My Element</a>
RokBox2 will find the element #my-element in the DOM, clone it and open the popup with the cloned element in it.
It is important to note that an element deep in the DOM might have specific styles coming from the template that could potentially get lost once the cloned element gets inserted in the popup at a different level. However, you can style the element in the rokbox popup by targeting it. For example:
.rokbox-wrapper #my-element {
    margin: 0;
}
Below is a screenshot of a real-world example of data-rokbox-element usage. We are creating a link that opens the search form right into RokBox2.
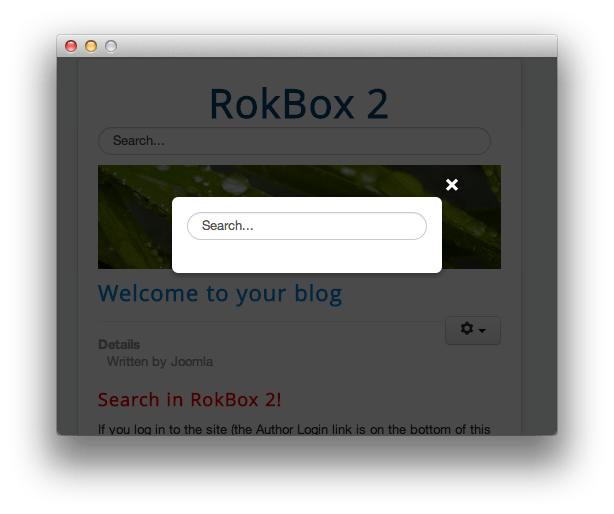
And this is the syntax used to achieve it:
<a data-rokbox data-rokbox-element=".header .search" href="#" style="color: red"><h3>Search in RokBox 2!</h3></a>
NOTE: It is important to always have an
hrefwhen using data-rokbox-element. Because it is not a true link pointing anywhere, you can use the hashhref="#"
data-rokbox-generate-thumbnail
RokBox2 comes with a built-in thumbnail generator, for local images, that can be configured from the Settings page found by navigating to Admin -> Plugins -> RokBox.
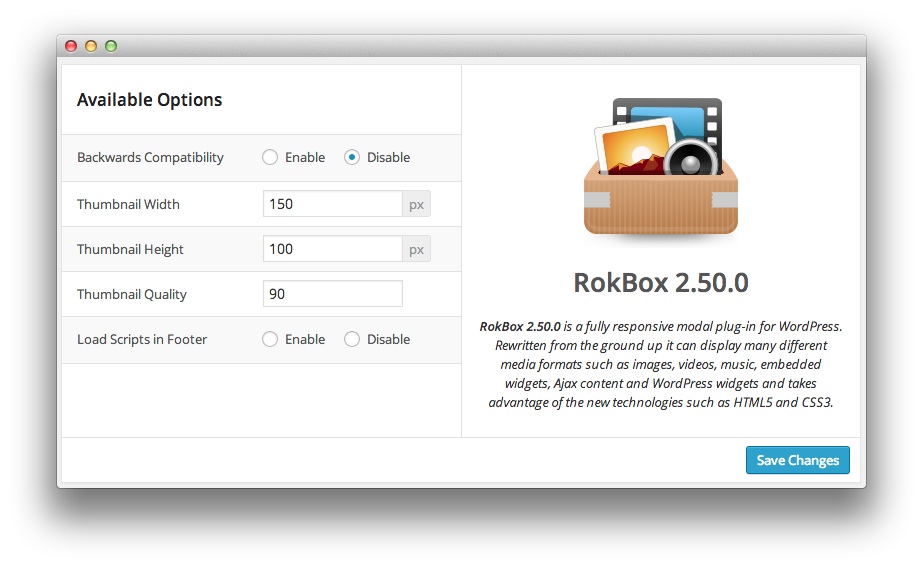
In these settings you can set the max width, max height and quality of a thumbnail. All thumbnails are saved as JPEG.
When you have a RokBox2 link pointing to a local image (stored under the same WordPress directory as your site), setting the data-rokbox-generate-thumbnail will trigger RokBox2 to create a thumbnail for you, at the same location where your local image resides and with the _thumb suffix appended to the name. It will also load it for you automatically, as if you were manually specifying the thumbnail to render.
<a data-rokbox data-rokbox-generate-thumbnail href="http://(your site URL).com/images/planes.jpg"></a>
As shown in the example above, we left the content of the <a> tag empty. Even if there was text written there, it would have been removed and replaced by RokBox2 with the auto-generated thumbnail.
The above example generates a thumbnail http://(your site URL).com/images/planes_thumb.jpg sized 150 x 100 and will automatically get rendered on the page as seen in the screenshot below.

NOTE: Auto generation of thumbnails works ONLY with local images. Generating thumbnails from remote images, videos, music and such, is not possible.
data-rokbox-size
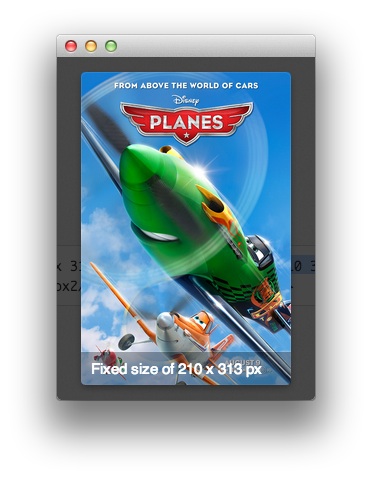
This setting allows you to define a fixed size for the RokBox2 popup. This affects templates that are either responsive or fixed, so beware that the popup will retain the set size no matter what the width of the browser window is.
To set up a fixed-size RokBox2 popup, add data-rokbox-size="210 213" to the image modifiers where 210 is the width and 313 is the height of the popup image.
You can alternatively use data-rokbox-size="210 100%" as this will enable automatic height for a box 210px wide.