WordPress: How to Install WordPress 3.x
How to do a Fresh Install of WordPress
Introduction
WordPress has a very simple approach to installation. The platform itself is designed to be easy to use, and its installation process is no different. In fact, you will typically see reference to the 5-minute installation on WordPress.org, and other popular WordPress resources.
In this guide, we will go through the process of installing WordPress. The process is the same whether you are installing a clean copy of WordPress for the first time, or a RocketLauncher pre-configured with plugins, widgets, and content from our demo.
Requirements
Before starting your WordPress installation, you will need to meet a few requirements. Having these things in order ahead of time will save you time and hassle during the installation process.
Here are the current hosting requirements for WordPress:
- PHP version 5.2.4 or greater
- MySQL version 5.0 or greater
WordPress recommends a server powered by Apache or Nginx for their feature set and security, but this is not a requirement. Any server capable of running these versions of PHP and MySQL is a likely candidate for WordPress.
You will need to have a MySQL database set up prior to installation. You can do this through your host's recommended method. Just make sure you have the location (typically localhost), username, and password for the database ready as you will need to use it during installation.
Step 1: Download and Unpack
The first step to installing WordPress is to download it either through WordPress.org or via one of our RocketLaunchers.
Once you have downloaded this ZIP file, unpack it so you have a folder containing the WordPress installation files and folders. The contents of this folder will then need to be placed in your site's root directory via FTP or your host's preferred upload method. Wherever you place this folder's contents will become the root directory for your site.
Alternatively, you can upload the ZIP file directly to your server and unzip it there, making sure the resulting files are moved to the directory you wish to have as the root of your WordPress install.
Step 2: Launch the Installer
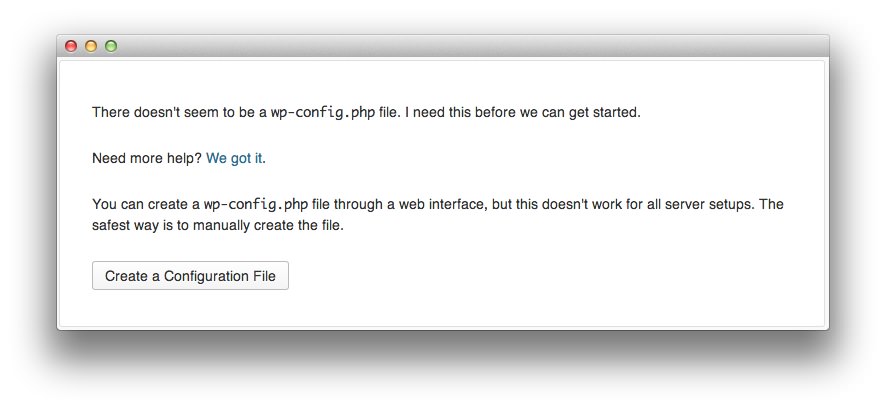
After creating your database and uploading WordPress to your site's root directory, you are ready to begin installation. To launch the installer, just go to your site's root URL. For example, if your WordPress blog is located at http://example.com/, use your browser to go to that URL and the first page that appears should look like the image above.
Simply select Create a Configuration File to initiate installation of WordPress.
Step 3: Verify the Required Information
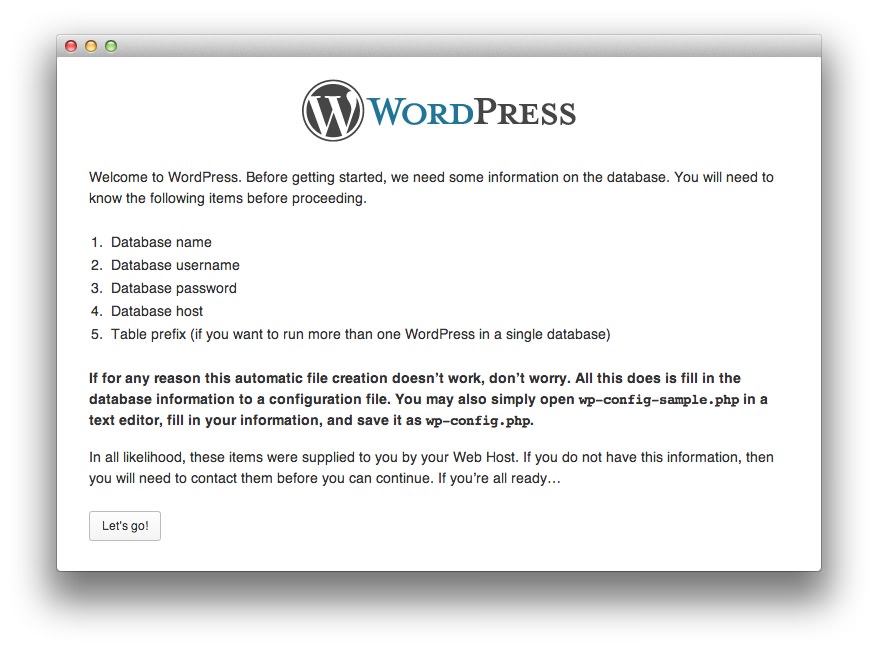
The next page is in place to make sure you have the required information you need to complete the installation process. Once you have this information at hand, select Let's go! to continue.
Step 4: Establish a Database Connection
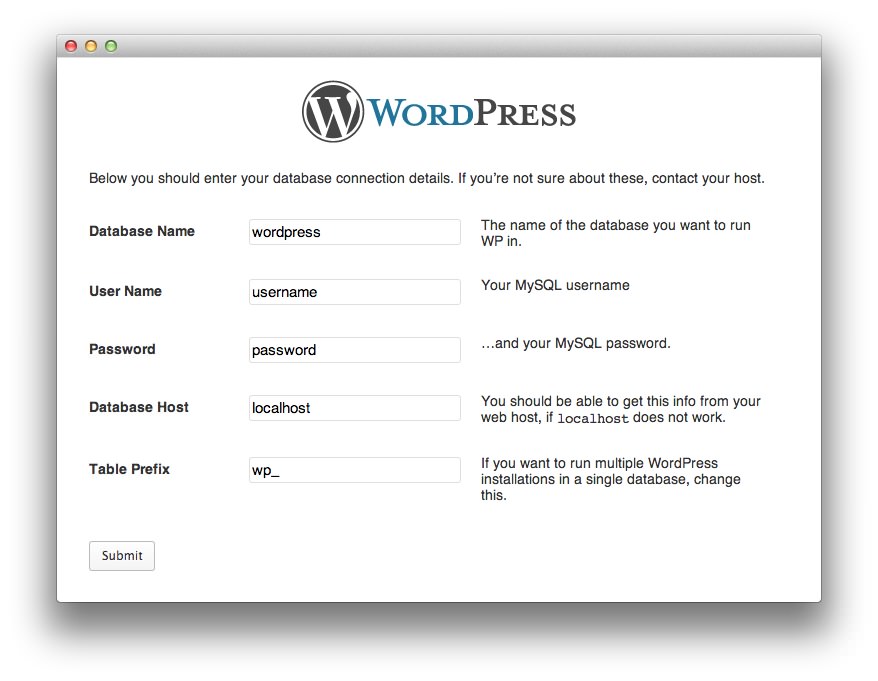
WordPress uses a MySQL database to host all of the information and settings used in your WordPress site. By establishing a link to the database, WordPress can build your site and accept any new data or changes you make later on.
If you come across a page that says "can't select database", you will need to check the name of your database to make sure it is entered correctly. Some hosts add a tag to the beginning or end of your selected database name to differentiate it from databases owned by other members of a shared server. This is typically your account name or the title of your primary domain name on the account.
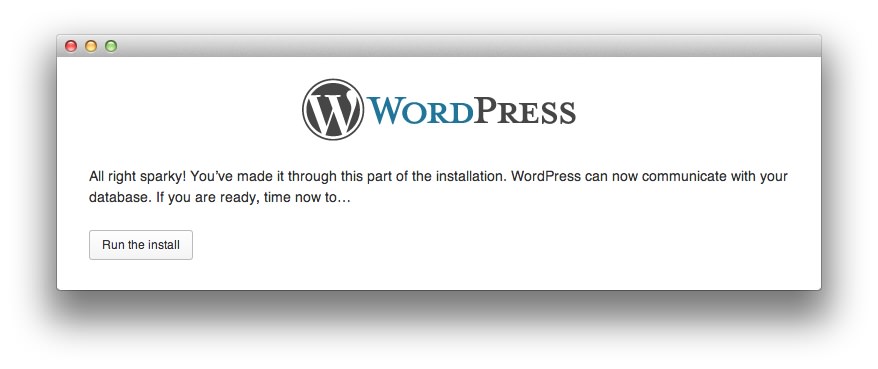
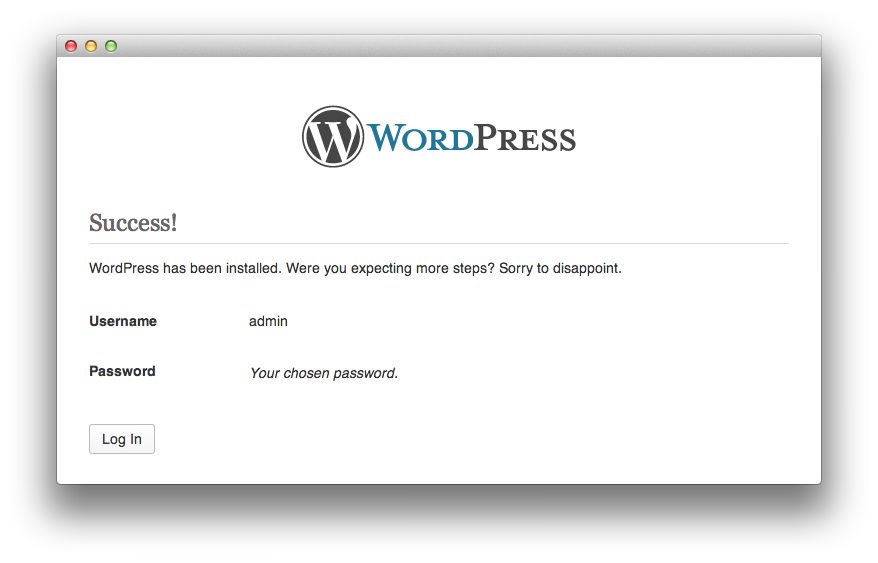
If a successful connection to the database has been made, a confirmation page will appear. Simply select Run the Install to continue to the next phase of installation.
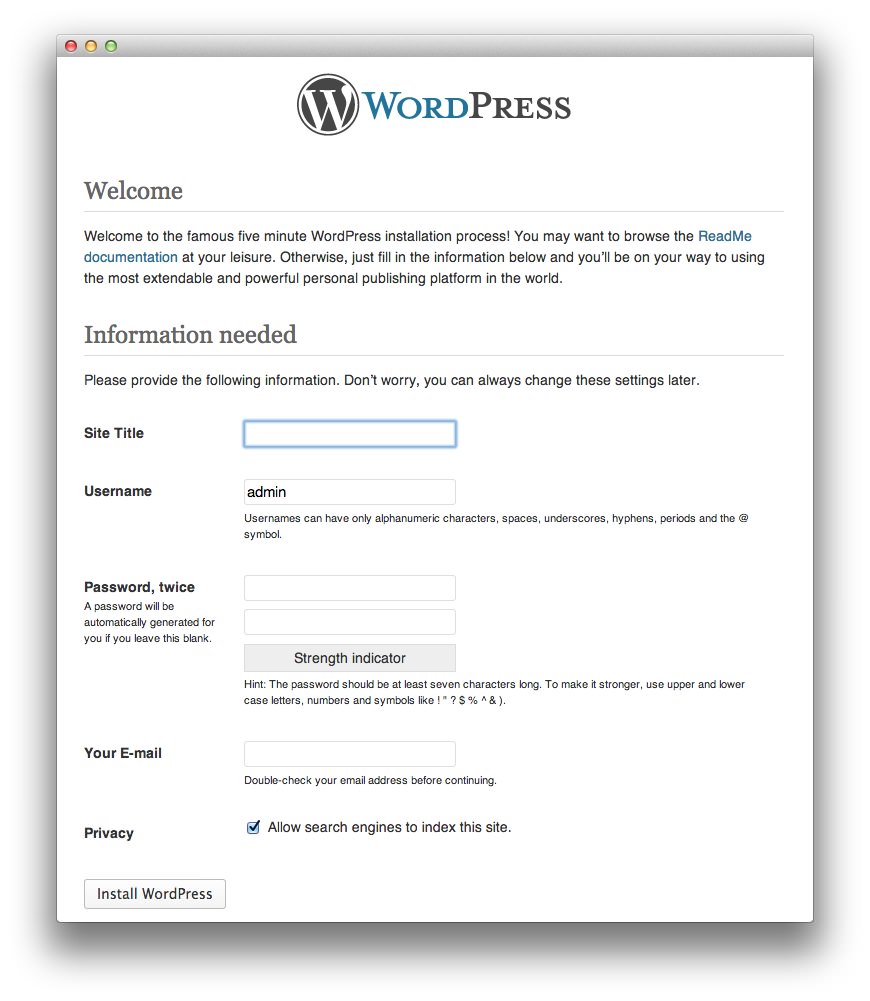
Step 5: Initial Configuration
-
 1TitleThis is the title you want for your site. It will appear in any search results related to the site.2UsernameYour administrator username does not have to be admin but should be memorable to you. It will be the managing account for the site apart from any additional administrator accounts you create later.3PasswordThis will be the password for the primary administrator account.4Your EmailThis is where you can enter an administrative email address to receive password resets and other information.5PrivacyYou can decide whether or not you wish to have your site indexed by the major search engines. This decision can be changed later.
Title: This is the title you want for your site. It will appear in any search results related to the site.
Username: Your administrator username does not have to be admin but should be memorable to you. It will be the managing account for the site apart from any additional administrator accounts you create later.
Password: This will be the password for the primary administrator account.
Your Email: This is where you can enter an administrative email address to receive password resets and other information.
Privacy: You can decide whether or not you wish to have your site indexed by the major search engines. This decision can be changed later.
In this screen, you will select your site's title, administrative username and password, as well as the administrative email address used to send you information regarding your site. Once this information is filled out, you need to select Install WordPress to complete installation and log in for the first time.