ProductScroller
Your Guide to the ProductScroller Extension for Magento
Introduction
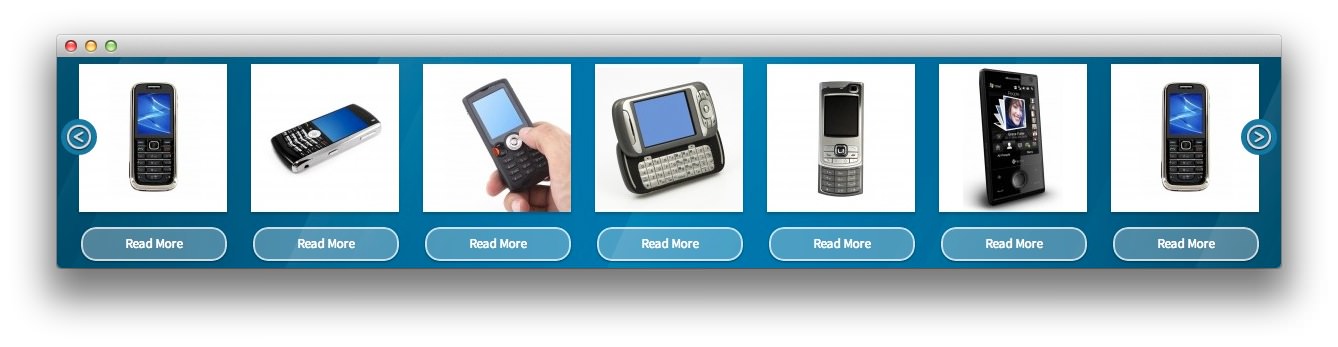
The ProductScroller module adds a scrollable product list to the home and category pages. The product scroller can be fully configured from the admin section. You can define how you want the Next and Prev buttons to function – either as Next Page buttons, or Next Product buttons. Next Page will scroll to the next full page of products, 4 products at a time (or more depending on how many products are shown per page – this is also definable, although you will also need to edit the CSS if you decide to change this value). Next Product will scroll one product at a time.
You can choose whether or not to truncate the product titles. This is useful if you have long product names that won't otherwise fit the product scroller design. You can also choose to enable the Circular plugin where you can have the scroller be on an infinite circlular loop, continually scrolling through the products, or else disable it and have it only scroll until the end of the product list and then stop, disabling the 'Next' button. You can also set the speed of the scrolling animation, and the number of products per scroller page.
NOTE: If you wish to use dynamically updating lists (Best-Selling, Recently Added, Most Viewed, & Highest Rated) you will need to disable the cache for Blocks HTML output by going to System -> Cache Management in the admin. If not, the lists won't be updated and the cached version will be displayed.
Setup
RokMage Modules can be managed via the configuration interface accessible by navigating to Admin -> System -> Configuration and clicking on the corresponding extension in the sidebar under RokMage Modules.
You will want to make sure that the Configuration Scope is set to the theme you wish to modify the settings unless you wish to change the default for all scopes.
-
 1Enable Homepage ScrollerEnables or disables the homepage scroller in the store view.2Enable Category ScrollerEnables or disables the category scroller in the store view.3Prev/Next FunctionSets the type of scrolling available. PRODUCT scrolls to the next product. PAGE scrolls to the next page of products.4Enable Scroll Button Fade AnimationThis allows you to enable or disable the fade animation that takes place when the prev/next function occurs.5Truncate Product TitlesTruncates product titles that are too long for the current design. Useful when some products have long titles that would interfere with the aesthetics of the scroller.6Max Titles LengthSets the maximum length (in characters) for product titles in the scroller.7Image SizeSets the image size (in pixels) for product images.8SpeedThis is the speed of the scroller (in seconds) of product/page transitions.9CircularAllows you to choose whether or not the scroller will loop around indefinitely.10Enable AutoscrollEnables or disables autoscroll which will rotate between products and/or pages without user input.11Autoscroll IntervalThe interval (in seconds) between product/page scrolling when autoscroll is active.12Products Per PageThis sets how many products will appear at one time in the scroller. CSS will need to be adjusted, also.
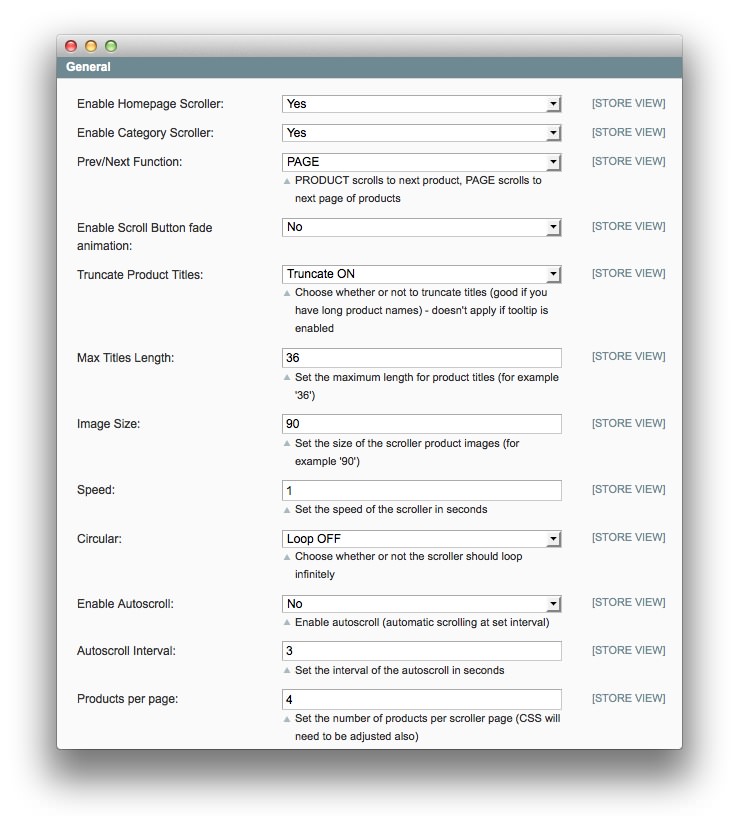
Enable Homepage Scroller Enables or disables the homepage scroller in the store view.
Enable Category Scroller Enables or disables the category scroller in the store view.
Prev/Next Function Sets the type of scrolling available. PRODUCT scrolls to the next product. PAGE scrolls to the next page of products.
Enable Scroll Button Fade Animation This allows you to enable or disable the fade animation that takes place when the prev/next function occurs.
Truncate Product Titles Truncates product titles that are too long for the current design. Useful when some products have long titles that would interfere with the aesthetics of the scroller.
Max Titles Length Sets the maximum length (in characters) for product titles in the scroller.
Image Size Sets the image size (in pixels) for product images.
Speed This is the speed of the scroller (in seconds) of product/page transitions.
Circular Allows you to choose whether or not the scroller will loop around indefinitely.
Enable Autoscroll Enables or disables autoscroll which will rotate between products and/or pages without user input.
Autoscroll Interval The interval (in seconds) between product/page scrolling when autoscroll is active.
Products Per Page This sets how many products will appear at one time in the scroller. CSS will need to be adjusted, also.
-
 1Use Tooltip for DetailsDisplays product details on an on hover tooltip.2Use Tooltip AnimationsIf enabled, tooltips will animate in and out of view.3Set Tooltip OffsetSets the offset position of the tooltip.4Disable RibbonsDisables the corner announcement ribbon.
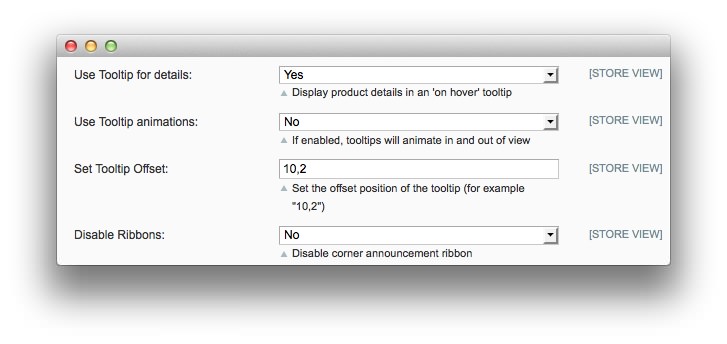
Use Tooltip for Details: Displays product details on an on hover tooltip.
Use Tooltip Animations: If enabled, tooltips will animate in and out of view.
Set Tooltip Offset: Sets the offset position of the tooltip.
Disable Ribbons: Disables the corner announcement ribbon.
-
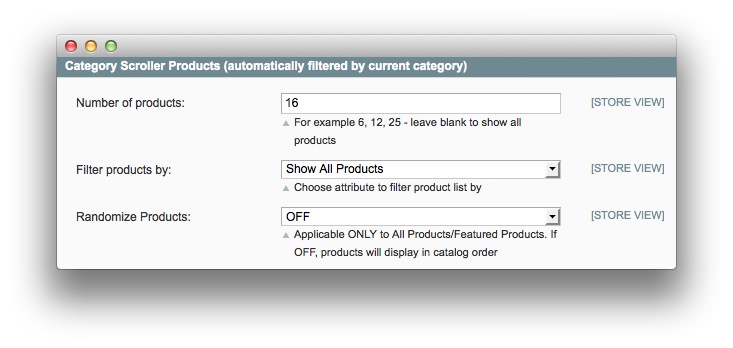
 1Number of ProductsDetermines the number of products show in the scroller. Leave blank to show all products.2Filter Products ByAllows you to determine the default filtering rules for products in the scroller.3Randomize ProductsDisplays products randomly within the scroller.
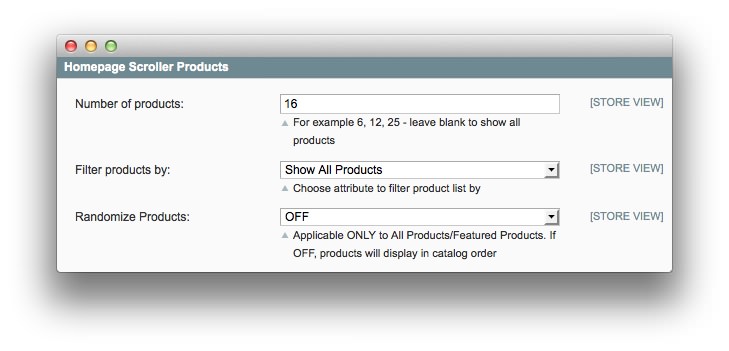
Number of Products: Determines the number of products show in the scroller. Leave blank to show all products.
Filter Products By: Allows you to determine the default filtering rules for products in the scroller.
Randomize Products: Displays products randomly within the scroller.
-
 1Number of ProductsDetermines the number of products show in the scroller. Leave blank to show all products.2Filter Products ByAllows you to determine the default filtering rules for products in the scroller.3Randomize ProductsDisplays products randomly within the scroller.
Number of Products: Determines the number of products show in the scroller. Leave blank to show all products.
Filter Products By: Allows you to determine the default filtering rules for products in the scroller.
Randomize Products: Displays products randomly within the scroller.
How to Install
You can download a zip package from the RokMage Extensions using the Download button above..
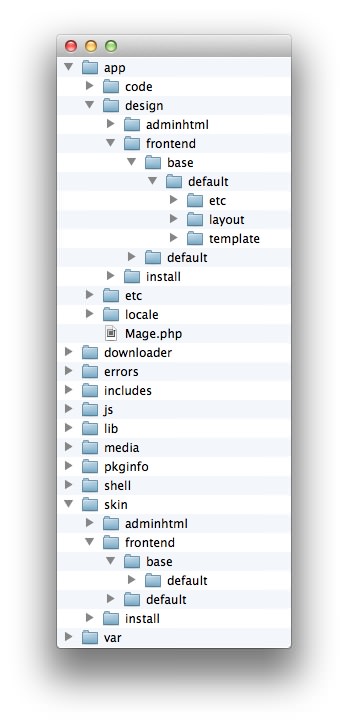
Once you have downloaded and unzipped the extension package, you will notice that the folder structure for the files has been included. This means you can simply copy the files/folders over to the corresponding folder of your Magento site, if developing locally.
If you are developing on a remote server, you can simply upload the app and skin folders to the Magento install on your server.
-
 1This can also be the name of your template package.2This can also be the name of your template package.
Magento uses a hierarchy system. Adding the files in the base folder will work with any theme package. You can also elect to add the layout, template, and skin files to your theme package folder (instead of base) in order to have the extension apply only to that theme. Anything placed in the theme package folder will override what exists in the base folder. Anything in the base folder is accepted as default.
If you download a RocketTheme Magento template, the extension files will all be included in the theme package folder, not the base folder.