Metropolis
Your Guide to Using the Metropolis Theme for Magento
Introduction
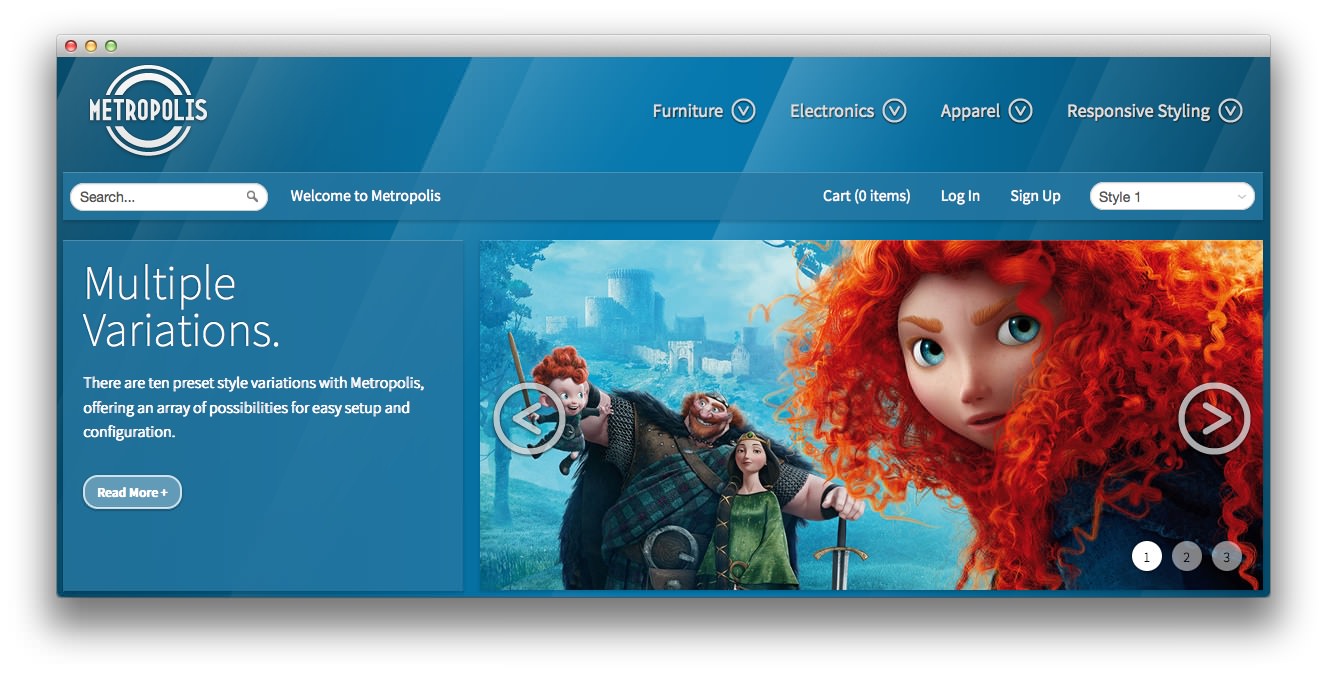
Metropolis, our 17th Magento theme release, is an elegantly designed template, combining simple color schemes and shades to complement an array of different content setups.
The theme boasts 10 style variations, with our 12 RokMage extensions seamlessly integrated with the design.
Features
- 10 Preset Color Variations
- MageMenus extension
- ModalHeader extension
- HomepageGrid extension
- CategoryView extension
- ContentSlider extension
- ProductScroller extension
- ProductView extension
- CmsCallouts extension
- ImageBorders extension
- FooterBlock extension
- ProductVideo extension
- FeaturedProducts extension
- Recently Viewed Footer Thumblist
- Smooth jQuery menu and other animations
- FF4+, Opera 9.6, Safari 3, IE8, 9 Compatible
- W3C XHTML 1.0 Strict. W3C CSS Valid
Responsive Theme
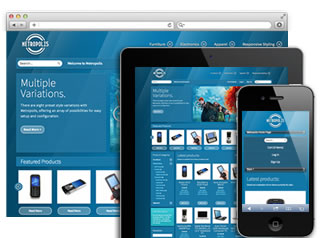
Metropolis is a responsive Magento theme. That means that there is no need for an additional mobile version of your store, as the template automatically adapts to the viewing device, such as a smartphone, tablet or desktop, based on the resolution of the screen.
This is achieved through @media queries - which can detect the width of the browser window, and allow for different CSS accordingly. It also detects if you are viewing from a mobile device, and if so, will display a mobile optimized version of our ProductView extension, complete with a product image gallery that can be browsed with touch slide gestures.
There are 5 "breakpoints" for the template, each one optimized to display your products prominently, making sure that everyone can browse your store from whatever device they please, from mobiles up to widescreen desktops. For example, the menu system for a smartphone device will be that of a select-field (a select field is a great solution for this because most phones have nice native select UI elements), whilst desktops will get the full animated dropdown menu.
RokMage Extensions
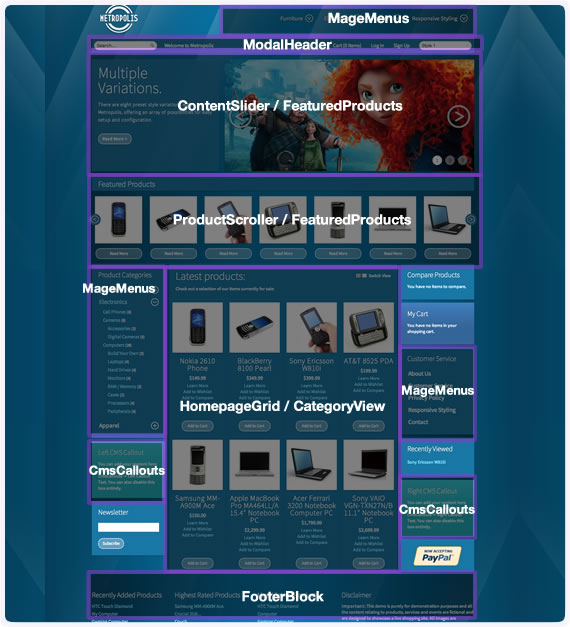
Metropolis utilizes 12 of our custom RokMage Magento extensions, which come fully integrated with the theme. Completely configurable from Admin Panel, via System -> Configuration -> RT RokMage Modules, these extensions allow you to easily arrange your store exactly how you wish - adding a vast amount of extra options not otherwise available - and giving you unprecedented control over the design of your store.
How to Install the Theme
Installing the Metropolis theme is quick and easy to do. There are numerous ways to do it, but we will outline the most common method(s) in this tutorial. We will start with the process you will likely want to go through if you are installing Metropolis on an existing Magento install.
If you are setting up a new site/store and wish to have sample data (such as that present in our demo) you should consider downloading the RocketLauncher, instead. Details for that process can be found below.
NOTE: We recommend backing up all of your data (including your database) prior to installing any new theme, extension, and/or making any changes to settings.
These instructions include the possible application of an extension settings SQL installer file. We put a blank installer file in place in order to preserve your already-existing settings. If you wish to have our settings applied, and do not mind them overwriting any existing settings you have made, the instructions for doing this can be found on Step 2. You should swap the installer file out prior to uploading the theme (Step 3).
Step 1: Download the Theme
To install the theme, you only need one file:
- Metropolis Theme (rt_metropolis_m.zip) This file is the theme package you will use to install your theme in Magento. All files are laid out in the correct directory structure, and are ready to be dropped into an existing Magento installation.
There are other files that you may wish to download that accompany the release, but are not required for the theme to work.
- Metropolis Source PNG(s) (rt_metropolis_m-sources.zip) This contains all the Adobe Fireworks PNG source files for the template, and if applicable, the logo font.
All of these files can be found on the Downloads page associated with the Metropolis theme.
Step 2: Set up RokMage Extension Settings
The integrated RokMage extensions are all included in the download zip. However, the configuration settings for each extension also make up part of the theme, as they control image sizes, layout options, animation settings, and so on. So, these changes also need to be added.
If you have set up a fresh Magento store (with or without sample data) and have yet to start on any customization, you can simply drop the extension settings SQL installer file (mysql4-install-1.0.php) into the ExtensionSetup module (app/code/community/Rockettheme/ExtensionSetup/sql/extensionsetup_setup/), replacing the dummy file that is currently there. This will assign the optimal configuration settings for this theme.
It will also automatically edit your CMS homepage to show the HomepageGrid extension, edit the other default CMS pages to use the correct RokMageLayout for the theme, and edit the footer menu CMS block to work within the FooterBlock extension. Be sure to replace the installer file BEFORE you add the theme files to your Magento installation, otherwise, the ExtensionSetup module will run with the dummy file in place.
You can download the extension settings installer file from the template download page.
NOTE: If you have already made customizations to your Magento store (CMS pages, store views, CMS blocks etc) or you have already installed the RokMage extensions with another theme and do not wish to lose your current settings, do NOT use this installer file. It will override your current setup. If you are comfortable dealing with SQL statements, you can edit the installer file to suit your needs. If not, you should add the extension settings manually through Admin Panel -> Configuration.
Step 3: Upload the Theme
- Extract rt_metropolis_m.zip
- Open your FTP client (FileZilla is a popular choice)
- Upload the contents of the unzipped folder to your Magento root directory, being sure to Merge and not Overwrite the files!
- Log in to the Magento administrator dashboard (http://www.(your url).com/admin/ by default)
- Go to System -> Configuration
- Click the Design tab on the left
- Under the Package heading, add
metropolisas the Current Package Name - Under the Themes heading, add the word
defaultas the Layout - Add
style1(or which ever preset you prefer) as the Skin (Images / CSS), and save
How to Install the RocketLauncher
If you are creating a fresh install and would like sample data included, you can use our RocketLauncher. This will install a complete version of Magento, along with all template files and extensions, plus the Magento sample data. It is basically a copy of our demo site minus some of the more difficult to remove sample data (such as reviews). This was done to make the process a little easier.
NOTE: Prior to starting installation, you need to to have a MySQL database created and active on your host. You will be asked for information about this database during installation.
Step 1: Unpack and Upload the RocketLauncher
- Download the Metropolis RocketLauncher Package (rt_metropolis_m-rocketlauncher.zip) from the Metropolis template downloads section.
- Unzip the package on your computer to reveal the rt_metropolis_m-rocketlauncher folder.
- Upload the contents of this folder to your server using a FTP client.
NOTE: on some servers, you can upload the zip and extract the package directly onto your server using cPanel or SSH access. For more details on this, please contact your hosting provider.
Step 2: Complete the Installation Process
- Direct your browser to the installation (for example, www.(your site).com/) URL.
- Follow the installation instructions, including filling out your database information.
- Complete your installation.