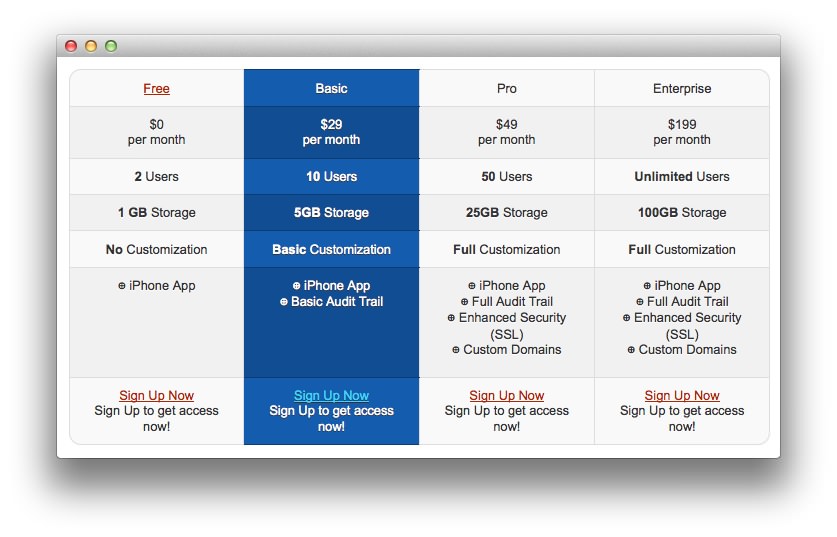
RokFeatureTable
Your Guide to Using RokFeatureTable for WordPress
Introduction

RokFeatureTable offers a stylistic and user friendly solution for displaying tabular based data. It is perfect for price or product comparisons, or essentially, any type of data display that suits a matrix format.
A simple, yet dynamic interface provides you with the tools to quickly edit the contents of the module. There are a series of parameters allowing for unlimited rows with options for text, link, class, and much more.
Key Features
- Unlimited Rows: Display extensive amounts of data.
- Extensive data control: Control over text, links, classes and other.
- Highlight Column Control: Set which column is defaulted as the highlight.
- Assign Custom Classes: Per classes control over tabular data.
- Custom CSS styles: Add per item in-line styling.
- theme specific layouts: Create a series of layouts.
Requirements
RokFeatureTable has the following requirements in order to operate:
- WordPress 5.x - Ensure you have the latest version.
- Compatible Browsers: Firefox, Chrome, Safari, IE8+, Opera.
NOTE: Internet Explorer 11+ and Edge are supported, but versions 8, 9, and 10 are no longer supported by Microsoft and while they may work, are not recommended.
How to Install
Installing RokFeatureTable takes just a matter of few minutes.
The first thing you will need to do is download the latest version of RokFeatureTable. The package you will download contains everything you need to get RokFeatureTable up and running and it is compatible with WordPress 3.2 or higher. It does not need to be uncompressed.
Once you have downloaded the package, go into the WordPress Administrator and:
From WordPress 5.x:
- Select from the top menu:
wp-admin -> Plugins -> Add New -> Upload - Click on the Choose File button
- Select the
wp_rokfeaturetable.zipthat you just downloaded from your local drive. - Click the Install Now button.
Once installation is complete, you will receive a message indicating that the plugin was installed successfully. To activate RokFeatureTable right away, select Activate Plugin from this confirmation page.
NOTE: RocketTheme packages can be updated by uploading the new plugin and/or theme files via FTP, replacing the ones that currently exist on the server. Alternatively, you can remove the existing plugin directory you would like to update via FTP and upload the new package through the backend Installation tool. Deleting a plugin and replacing it using only the Plugin Manager can cause plugin settings to be lost. In either case, we recommend deactivating the plugin or theme prior to replacing its files.