Acronym: Accordion Particle
Your Guide to Recreating Elements of the Acronym Demo for WordPress
Introduction
The Accordion particle enables you to display one or more items in a single column.
Here are the topics covered in this guide:
Main Options
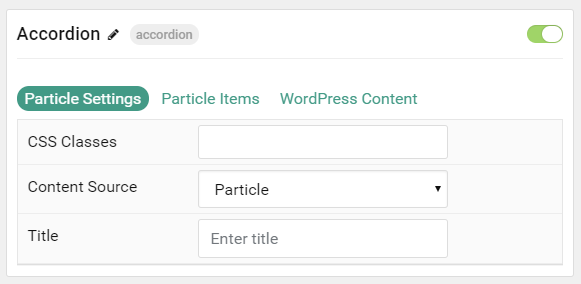
Tab A - Particle Settings

| Option | Description |
|---|---|
| CSS Classes | Sets the CSS class for the content of the particle. |
| Content Source | Choose between Particle and WordPress as your content source. |
| Title | Sets the title of the particle, as it will appear on the front end. |
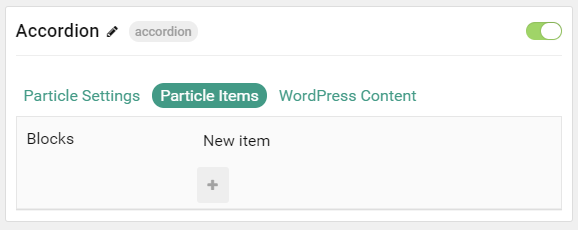
Tab B - Particle Items
This tab enables you to create items that appear in the particle. It is useful if you choose the Particle content source.

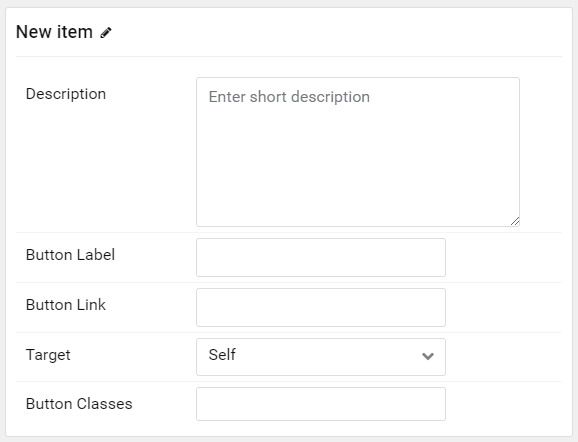
Item Options
These items only appear on the front end if you select Particle as the Content Source.

| Option | Description |
|---|---|
| Description | Enables you to enter a descriptive paragraph to be displayed in the item. |
| Button Label | Enter a text label that will appear as the link in the item. |
| Button Link | Set a link you would like the item to connect to. |
| Target | Choose a target (self or new window) for the link. |
| Button Classes | Enter any CSS class(es) you would like to have apply to the button link. |
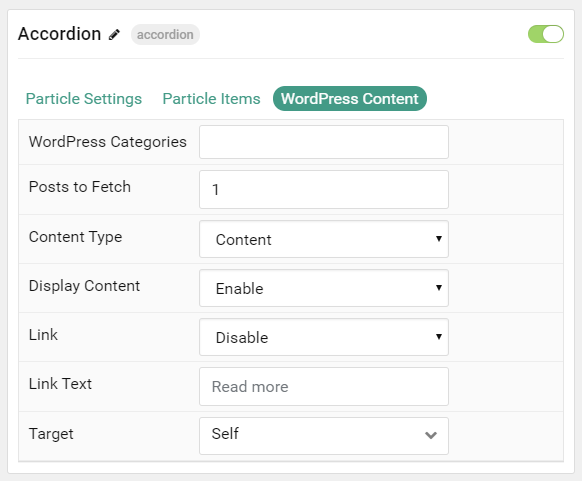
Tab C - WordPress Content
This tab is where you configure how WordPress content appears as items in the particle. It is useful if you choose the WordPress content source.

| Option | Description |
|---|---|
| WordPress Categories | Select the categories of posts this particle will display. |
| Posts to Fetch | Select the number of posts you would like the particle to fetch. |
| Content Type | Select the type of content to display in the particle. Options include: Content and Exerpt. |
| Display Content | Enable or Disable the display of the post(s) content or excerpt. |
| Link | Enable or Disable the linking of the post(s). |
| Link Text | Enter the text you wish to have displayed as the read more link. |
| Target | Select Self or New Window as the target for the link. |
Found errors? Think you can improve this documentation? Please edit this page. You can also view the history of this page.