RokMiniEvents
Your Guide to Using RokMiniEvents for Joomla
Introduction
In previous versions of RokMiniEvents, we were able to utilize Google's v1 and v2 API to easily link Google calendars to the extension. In November, 2014, Google discontinued support for previous versions of the API in favor of Google Calendar API v3. This change meant having to find a new way to connect calendars to RokMiniEvents.
Below is our step-by-step process for achieving this using the new API.
Google Calendar Settings
With the release of Google's Calendar API v3, some calendars which existed and worked off previously may no longer be immediately accessible to third-party applications. This can be frustrating, but there is a way around it.
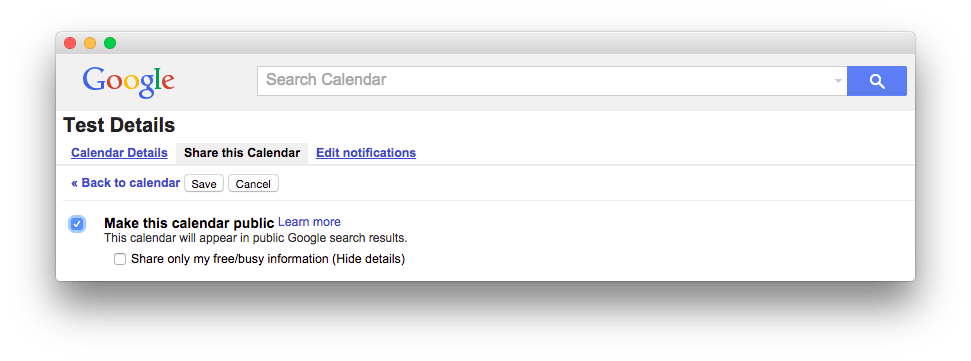
First, you should make sure that the calendar you are linking to RokMiniEvents is set to Public. This ensures that RokMiniEvents is able to access it. You can do this by navigating to the calendar's settings and selecting the Share this Calendar tab. After that, simply select Make this Calendar to Public and click Save.
Your calendar is now set to public, and should be accessible by RokMiniEvents.
-
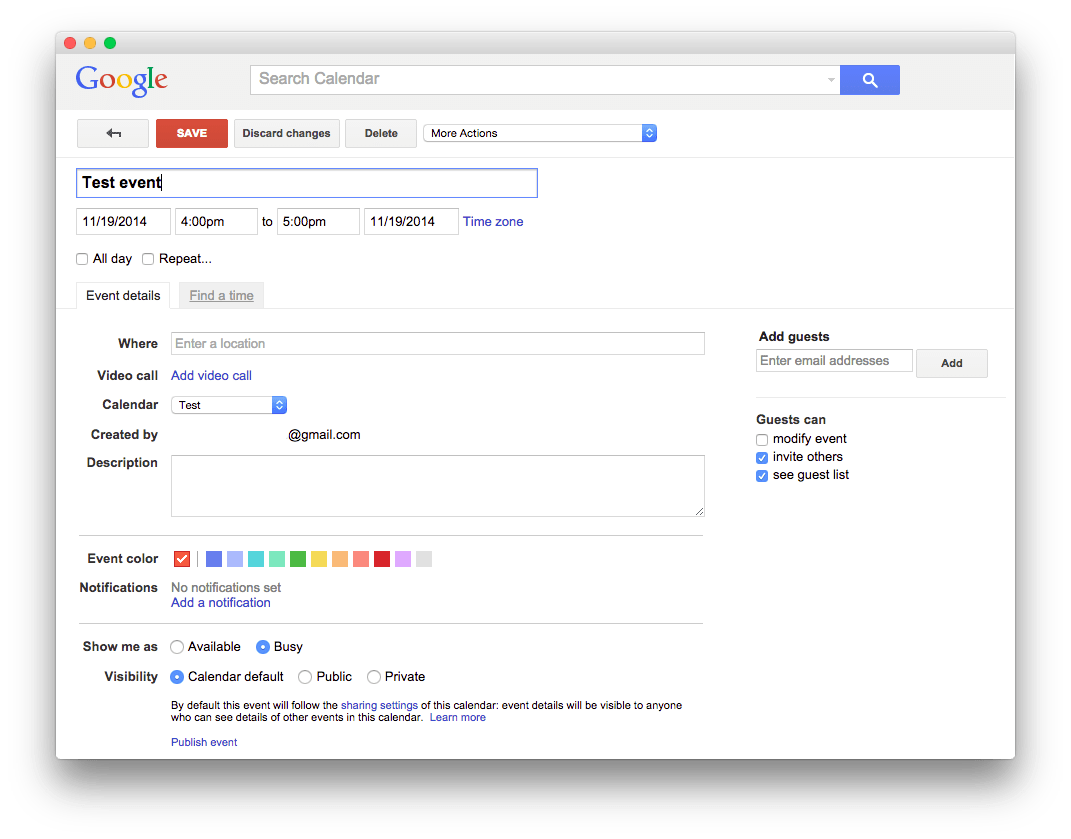 1VisiblitySet the event's visibility settings here.
Older calendars may have event-specific defaults set in a way that makes them invisible to the v3 API. This can be corrected by going to the event's settings and checking off Calendar Default under Visibility. If this does not work, you can set the individual event(s) to Public.
Newer calendars should work just fine with a Public calendar and events set to Calendar Default.
Google Developers Console
The first step you will need to take is to pay a visit to the Google Developers Console. You will need to have and be signed in to an active Google account.
Once you have logged in, you will be greeted by a page either listing your current projects or letting you know that you need to create a project to continue. You will need to either Select or Create a Project.
This console will also be where you generate the OAuth Email Address and P12 Key you will need later.
Here are the steps to create a new project and generate the necessary information:
- Select Create Project.
- On the popup, give your project a Project Name. You can also assign it a unique Project ID, though one is automatically generated for you.
- Click Create.
- You should be automatically forwarded to the Project Dashboard. From here, you will want to navigate using the sidebar to APIs and Auth > APIs.
- If you have not already, search for the Calendar API and set the Status to On.
- Navigate to APIs and Auth > Credentials from the sidebar.
- Select Create new Client ID.
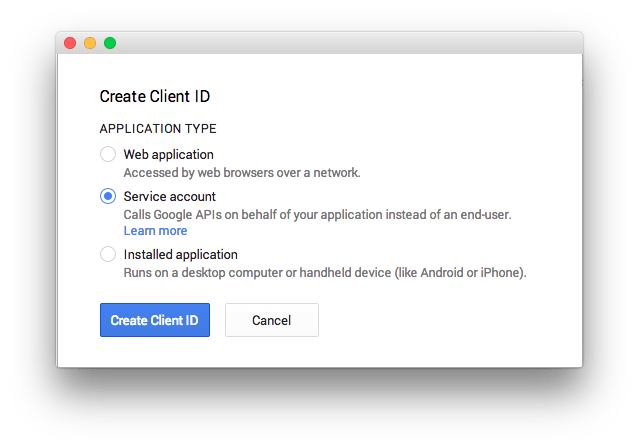
- In the popup, select Service Account and click Create Client ID.
- After a few seconds, you should receive a popup indicating that a New Public/Private key pair has been generated. Click Okay, got it to continue.
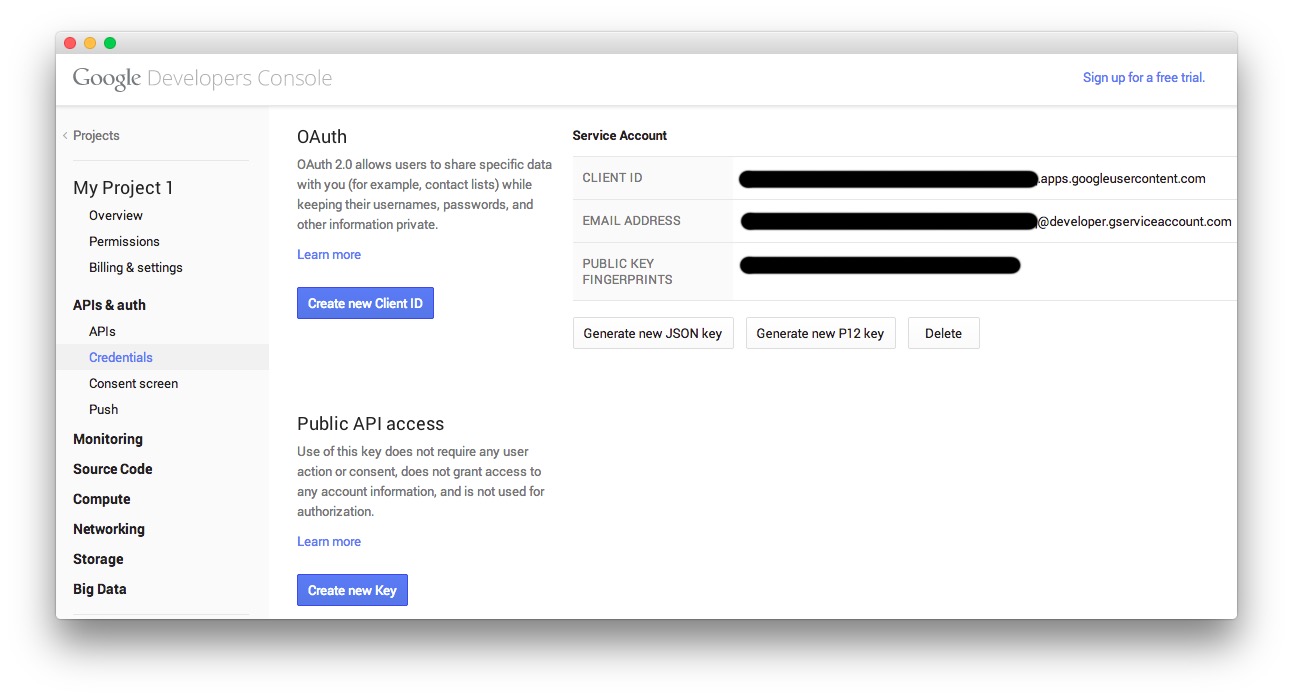
You should now see a page similar to the one pictured above. You may have also automatically downloaded a .p12 file. You will need this file in the next step.
RokMiniEvents Setup
Now that you have generated the P12 key and your Email address needed by RokMiniEvents, you will will need to put the key file in your site's file system.
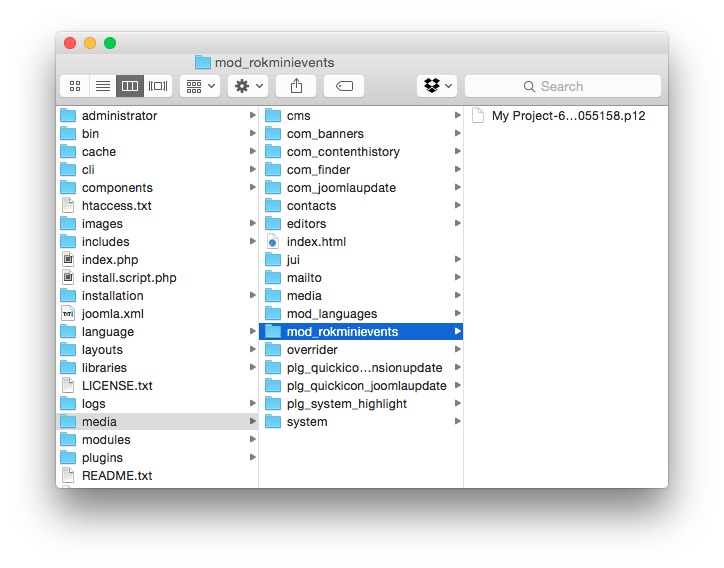
We recommend placing the file in /media/mod_rokminievents/ as this is the default, pre-filled value in the field. You can, however, place the file wherever you would like, as long as you remember to change its location in the P12 Key Location field. You will also need to change the name of the file reflected in this field to its actual name as given by Google. Do not change the name of the file itself!
NOTE: The folder mod_rokminievents does not exist in the /media directory by default. You will need to create this folder manually.
-
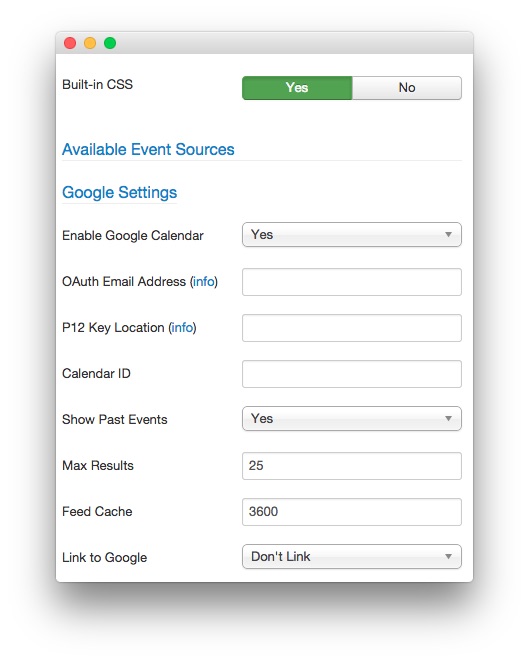 1OAuth Email AddressThis is the email address assigned by the Google Calendar API to your project's service account.2P12 Key LocationThis is the local location of the P12 key file you received when setting up the Service Account in Google Developer's Console.3Calendar IDEnter the Google Calendar ID (in email address form) to add a Google calendar as a resource for the module.
The OAuth Email Address field should include the information listed as the Email Address in the Service Account information screen we pulled up earlier. Just copy and paste this address in its entirety.
The P12 Key Location field, as explained previously, should be the path and filename to the file you automatically downloaded from Google during the project setup. If you no longer have this file, you can request a new one by selecting Generate new P12 key from the Developers Console.
Enter the Google Calendar ID (in email address form) in the Calendar ID field to add a Google calendar as a resource for the module. You can obtain the calendar ID for a calendar you have appropriate permissions to by visiting the calendar in your browser and navigating to Settings > Calendars, selecting the calendar you wish to use, and copying the Calendar ID located in the Calendar Address section of the page. You can find more information about this from Google.