Vermilion: Coming Soon
Your Guide to Creating Elements of the Vermilion Demo for Joomla
Introduction

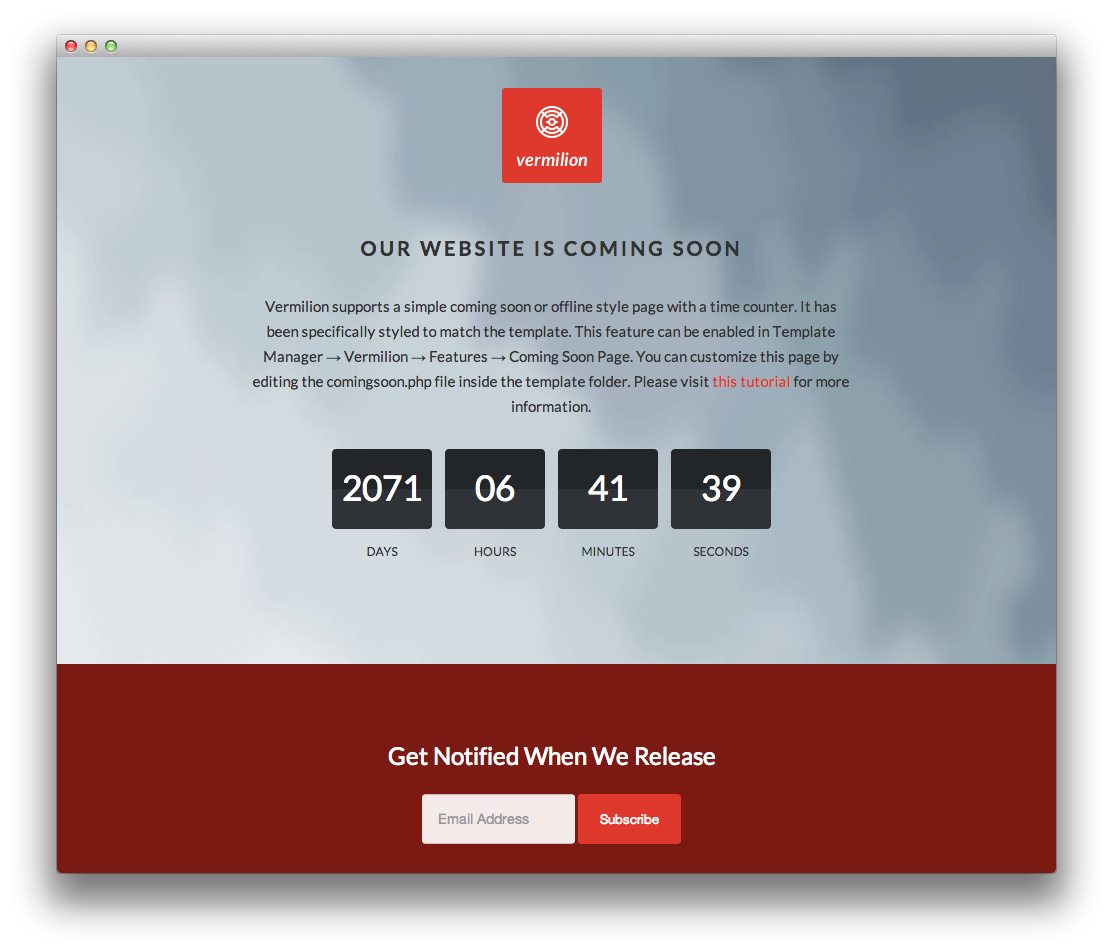
Vermilion features a Coming Soon page which allows you to display a stylish page indicating that your site is either being worked on or under construction. This page includes a countdown timer, your logo, and an area for text you can use to share any information you would like to about the pending release.
You can also have users subscribe to a newsletter should you wish to email them and let them know when the site is up, as well as keep in touch to share regular updates and information.
How to Enable/Disable the Page

The Coming Soon page can be enabled or disabled from the Features tab in Template Manager. You can opt to create an override for this page, or enable it on your primary template, accordingly. You can reach this option by navigating to Administration -> Extensions -> Template Manager -> Vermilion -> Features and turning Coming Soon Page on or off.
NOTE: Your site will not automatically go live once the counter has reached 0. You will still need to disable the Coming Soon page in the Features tab as well as ensuring the site is set to Online in Global Configuration. The Coming Soon page will also not appear if the site is set to Offline, so even when you only have this page appearing to visitors, the site should be set to Online.
How to Make Changes
Making changes to the Coming Soon page will require you to access a file and make manual changes yourself. It is not as difficult as it sounds. All of the changes you might want to make to this page can be done by visiting /templates/rt_vermilion/comingsoon.php and altering its code. Some of the more common changes are listed below.
Countdown Timer
You can set the timer by visiting the Features tab within the Template Manager. Navigate to Administration -> Extensions -> Template Manager -> Vermilion -> Features and find the date settings within the Coming Soon Page section. Here, you can set the end date by entering the day, month, and year you want the timer to expire. Setting the Show option to On will turn the page on.
Email Subscription
To enable or disable the sample email subscription form, you can navigate to Administrator -> Extensions -> Template Manager -> Vermilion -> Features -> Email Subscription to turn it on or off. By setting this option to On, you are turning on the email subscription form in both the Offline and Coming Soon pages.
You can find out more information on creating a FeedBurner Email Subscription here.
Language
We have also added a number of language constants to display the text for the Coming Soon page. For example, in the same rt_vermilion/comingsoon.php file you should see language constants such as:
'RT_COMINGSOON_TITLE', 'RT_SUBSCRIBE'
These constants are defined in rt_vermilion/language/en-GB/en-GB.tpl_rt_vermilion.ini. For example, you should see:
RT_COMINGSOON_TITLE="Our Website is Coming Soon"
RT_COMINGSOON_MESSAGE="Vermilion supports a simple coming soon or offline style page with a time counter. It has been specifically styled to match the template. This feature can be enabled in Template Manager → Vermilion → Features → Coming Soon Page. You can customize this page by editing the comingsoon.php file inside the template folder. Please visit <a href='http://www.rockettheme.com/forum/index.php?f=850&t=216272&rb_v=viewtopic'>this tutorial</a> for more information."
RT_COMINGSOON_SUBSCRIPTION_TITLE="Get Notified When We Release"
RT_AUTHORIZED_LOGIN_MESSAGE="This feature hides your Joomla site behind the Coming Soon page with its Countdown timer. You can still access the frontend of the site by logging in as an administrator below. You can customize this message in the Vermilion template language file."
To override any of these constants, visit your Joomla admin and go to Extensions -> Language Manager -> Overrides -> New.
In the Language Constant inputbox, put any constant you wish to override, such as:
RT_COMINGSOON_MESSAGE
Once this is done, place your desired text in the Text box to display your text.